Over the years I have assisted in several setups and tear downs of Free-mo setups. Getting your modules in and setup quickly are key. Everyone wants to get to running trains as soon as possible. The same holds true for tear down, I do not want to be the last one still packing my modules at the end of the night. I have seen a lot of good ideas and a lot of ideas not well implemented. From these experiences I have tried to implement the best of what I have seen and improve them where i can. In this article I will review my solutions for transport of my Free-mo module set “The Boat Yard”. I do not think I have the best solution, but surely a very good set of solutions for my situation.
The module set consists of 6 modules 49.5″ by 26″. When assembled the total length is 25′. These modules get stored in my basement and must fit through at least three doorways and a stairway to exit the home. I also must move them by myself most of the time. I am lucky and own a pickup truck with a six foot bed so fitting them in is not much of a problem but if you have a minivan or station wagon, this solution is compact enough it may work for you.
Requirements:
- Fit through doors with room to spare
- Assemble/disassemble easily and quickly
- Roll easily on most surfaces
- Light enough to lift one end by myself without much effort
The Boat Yard was designed to be mostly yard and as a result, the terrain is flat. This made it a good choice for face to face module positioning with the modules laying on their side. There are some drawbacks to this:
- Possible damage to the fascia
- Loss of scenic materials
- Tall items must be packaged separably
As with anything, we must weigh these disadvantages, overcoming them or dealing with them as required. The most easily damaged scenery is anything the protrudes from the surface of the module. I decided early on that the only permanent scenery would be less than one inch tall. So scale fences and signs are ok but telephone poles, buildings and other tall items must be removable. Wherever possible, flexible “posts” were used so they would bounce back if they did get bumped. All scenery elements that are attached must be glued very well or reinforced to take the shock of handling. If it can’t take it, it is added to the scenery box and applied after setup.
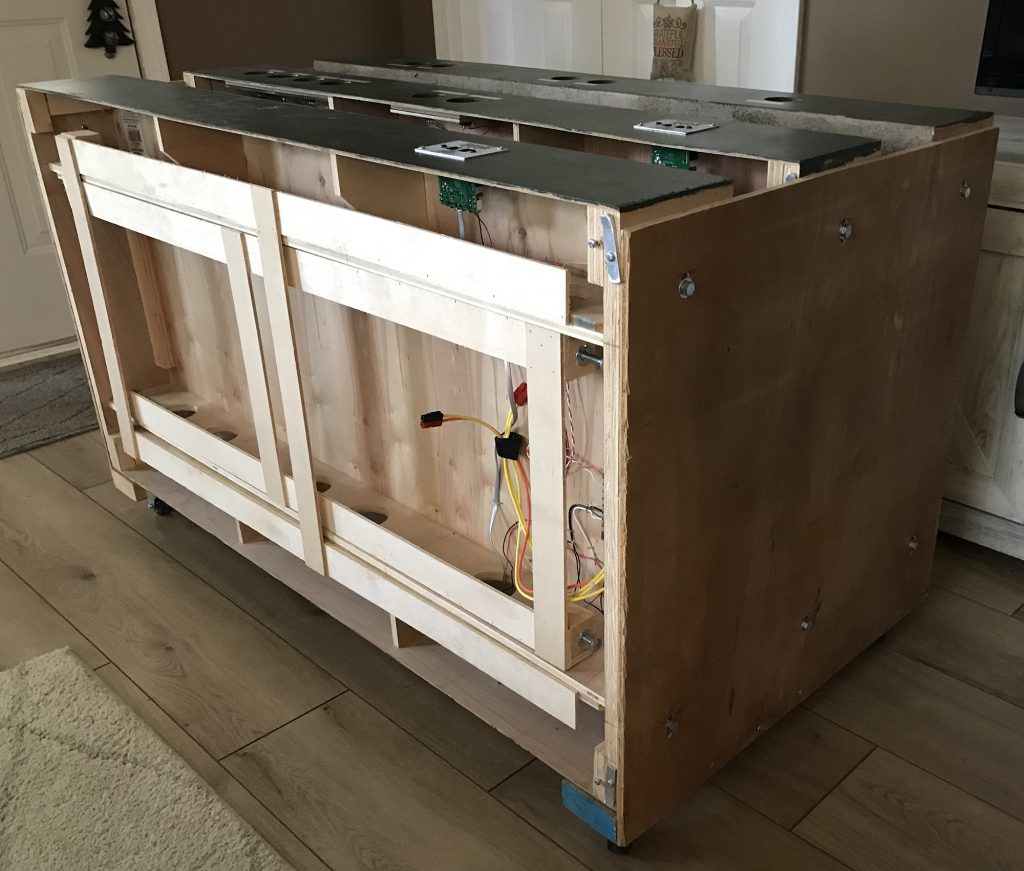
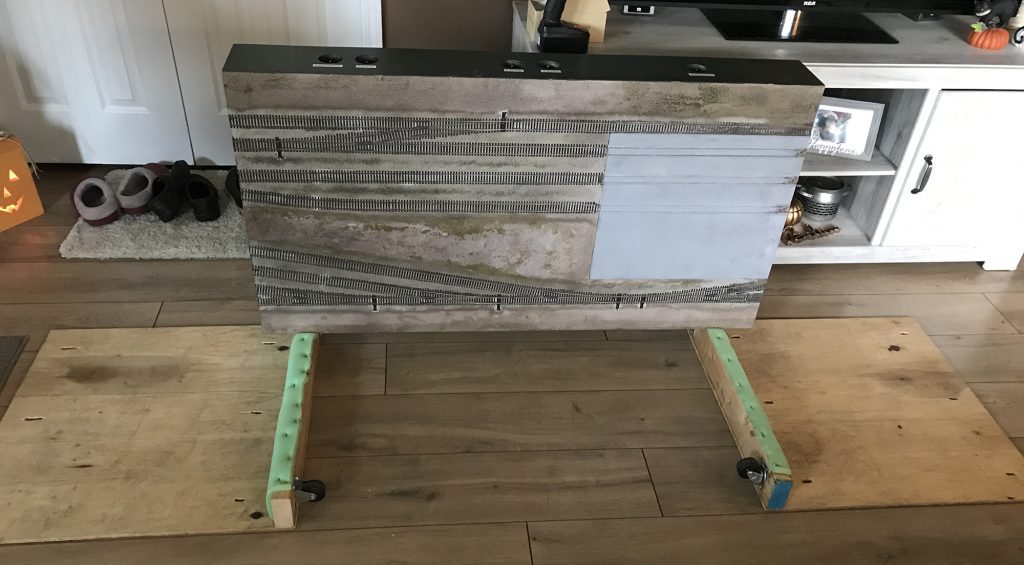
Since the modules themselves are very light and rigid, I decided to use a cart design to link the modules together for transport. Past experience had show many flaws with cart designs. Bolting and unbolting them led to alignment issues and things coming loose over time. It seemed like we spent more time assembling the carts than if we had just lugged each module out to the vehicle individually. I decided to do things a little different for this design.
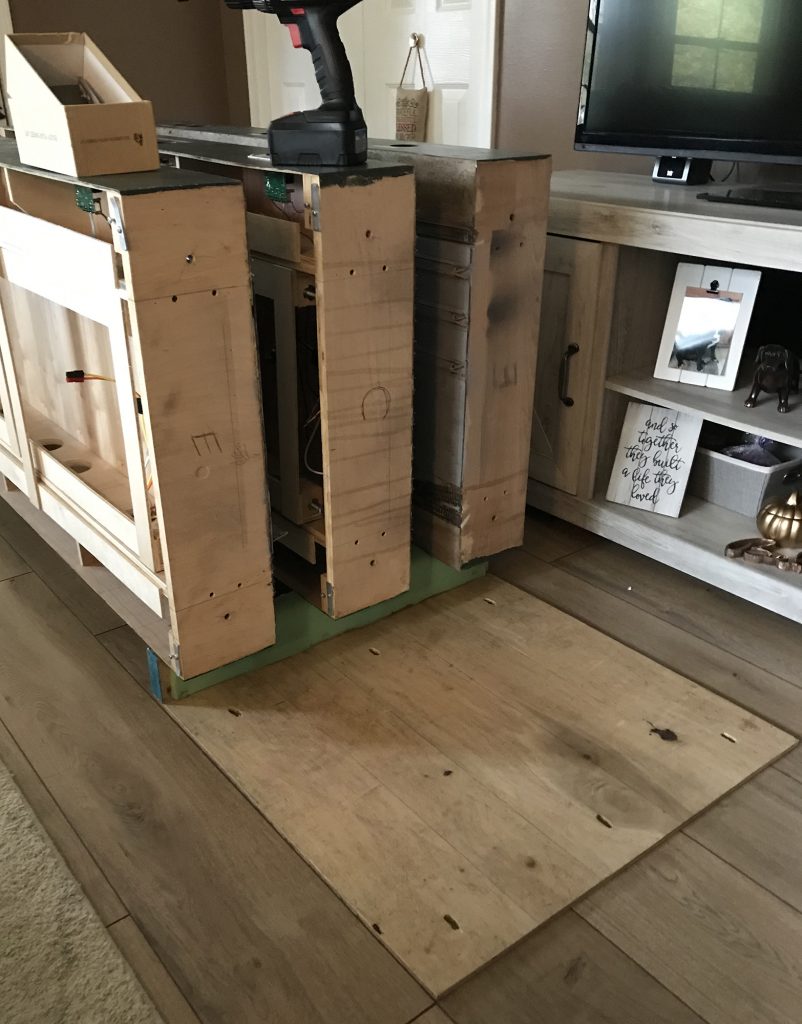
The cart would use the structural integrity of the modules to create the structure of the cart. The modules would also sit on edge so I did not have to lift any module over the top of another and risk damaging the lower module. this design also has the advantage of only having to connect one end until all the modules were positioned. then the opposite end could be aligned and attached easily.
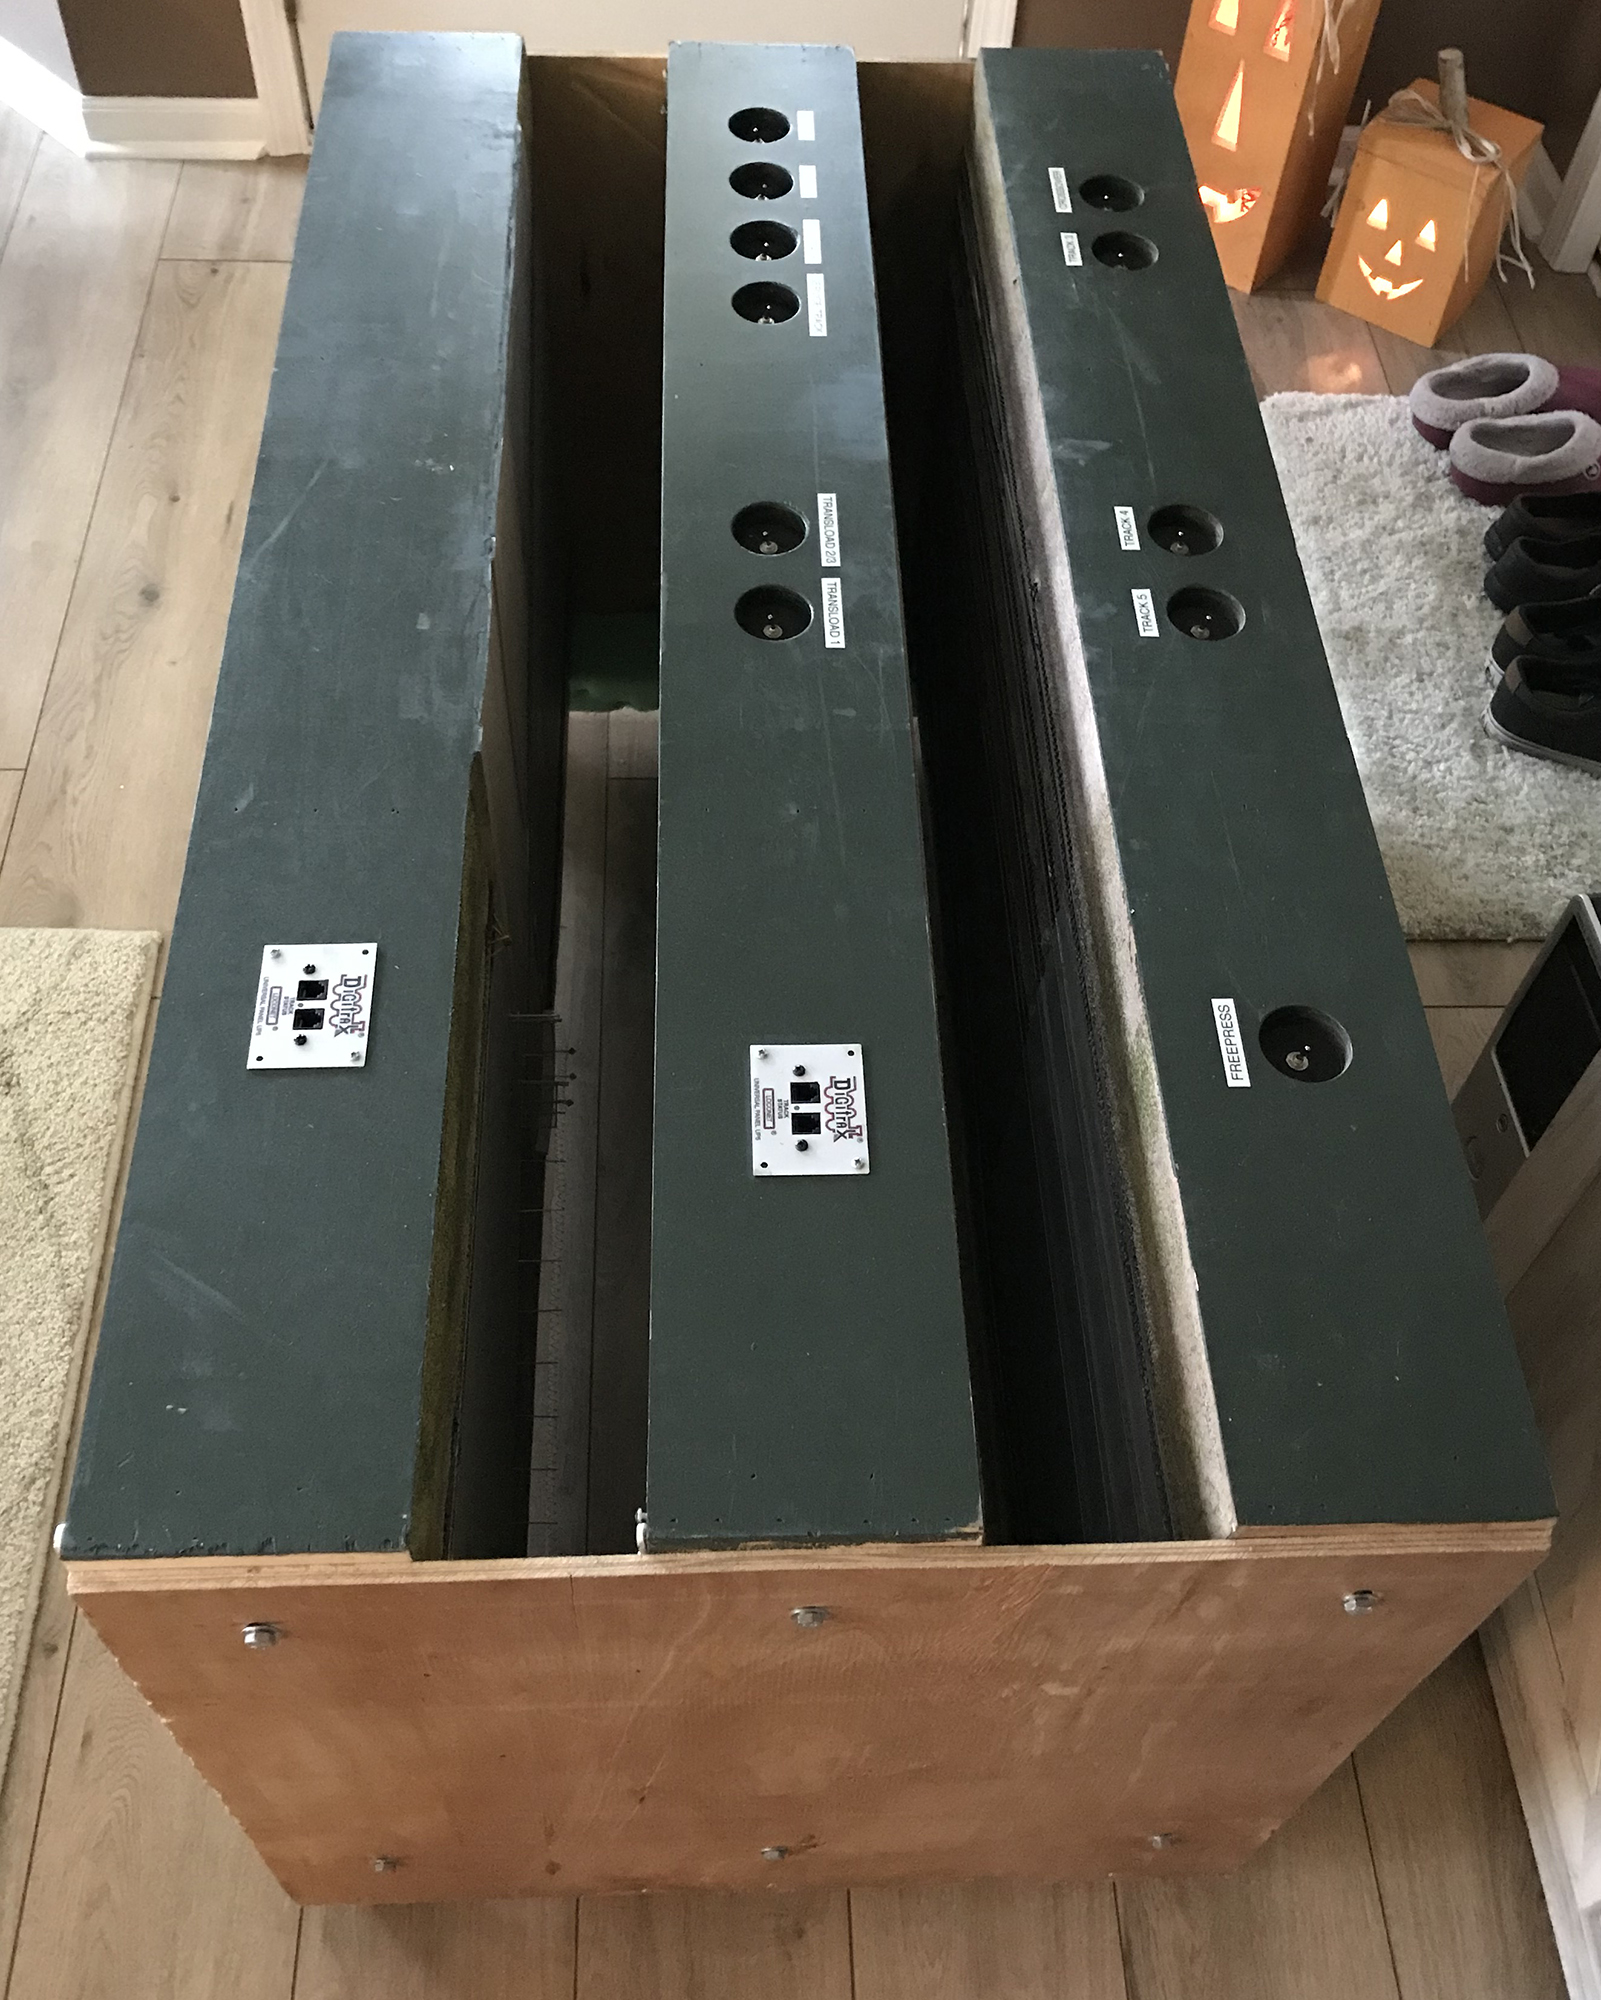
With the above in mind I measured the most narrow doorways in my home and looked up what the narrowest door allowed by code is. After all you never know where you may end up. For the most part entry/room doors are never less than 30 inches wide with the trim so 28 inch maximum is what I would recommend so there is finger room. I actually went with a 27 inch width which allowed for 3 – 6 inch tall modules with 4.5 inches of space between each one. 27 inches also worked out perfect for the height of the end plate. I used a 2×4 as the bottom plate which the modules would rest on. I then glued and screwed the ends to the 1.5 inch side of the 2×4. I will note here that both glue and screws are a must! I have seen screws come loose over time and just glue is not enough.
The modules will sit on their side and they will have their weight and fascia on that 2×4 plate. All the fascias on these modules are thin ply that is painted. To protect them, I applied foam cushion (the same as used in chairs) to the top and side of the plate. Why the side? When the end is unfastened, it drops down and supports the modules as you remove them from the cart. The foam protects them at this point.
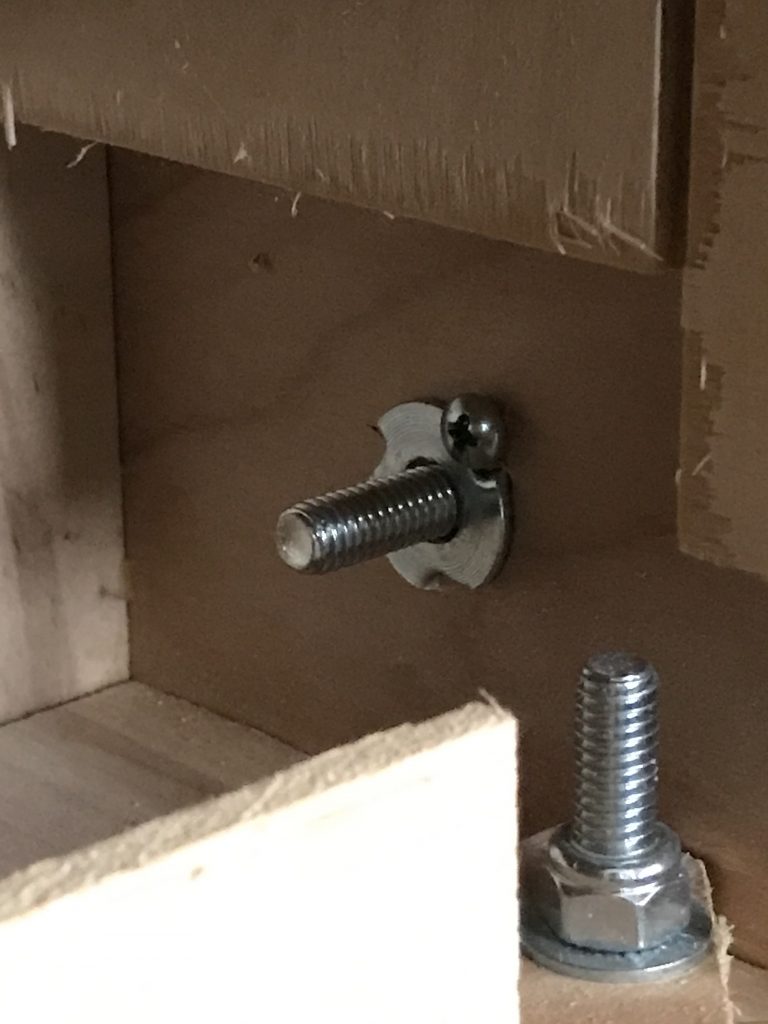
To fasten the cart end plates to the modules, I used hidden t-nuts mounted on the inside if the module frames. Make sure to use a small screw to hold the t-nut in place. I cannot tell you how many times I have seen these fall out at a show. I used a template to make sure I drilled the holes for the t-nuts and bolts in the exact same place on every module. This made everything interchangeable and eliminated trying to find the right end for the right module. The end plates of the cart have slots instead of holes. This makes lining up the module holes a breeze! you can actually see the hole in the module through the slot and do not have to hunt for the hole.
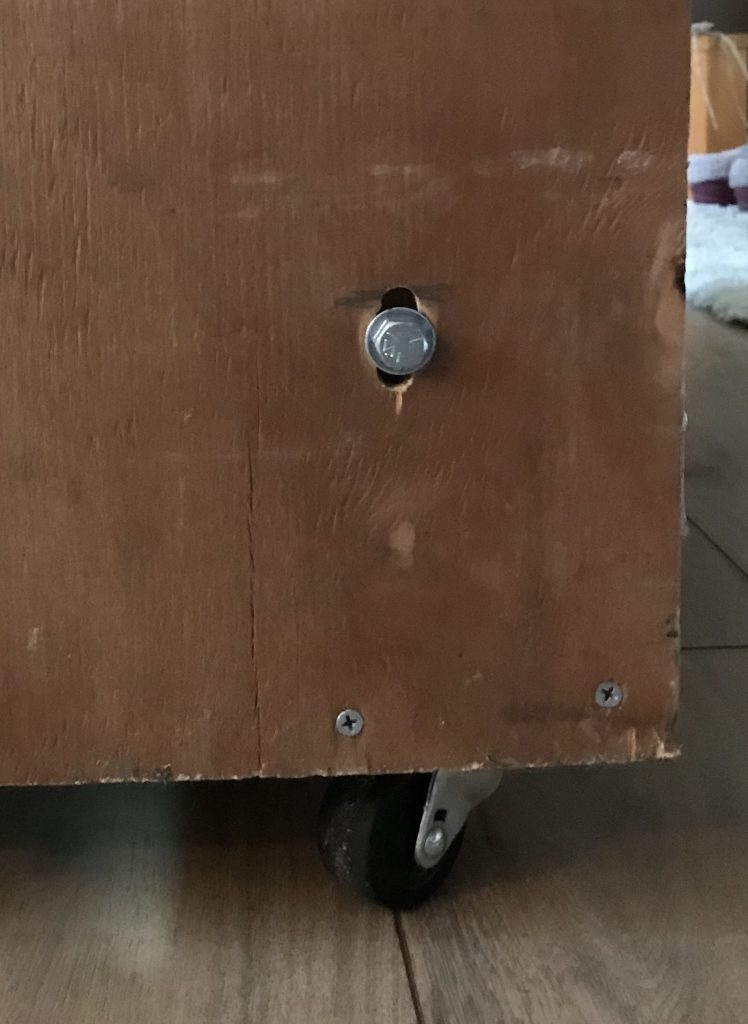
The final piece of the cart puzzle was the wheels. DO NOT SKIMP ON THE WHEELS! Always go with a large caster. Although your setup may be in an air conditioned building with a concrete floor, you will curse to no end on that gravel surface you had to park on, the boardwalk you had to roll across and every uneven doorway you come across. The larger wheels are a joy and make life much easier. You also want to place one set of swivel wheels on one end of the cart but not both. Putting them on one end allows you to turn yet maintain control. Swivel wheels on both ends make the cart uncontrollable.
So here is the short list of enhancements that you must have in a cart design:
- Large wheels
- Slots for alignment holes
- Screw and glue for strength
- Foam padding for protection
- Nothing over 28″ wide to fit through doors
- Use a screw to hold t-nuts in place
- Use a template to drill holes so they are all in the same place
If you have additional tricks or a different design, please share them!