
 If there is a chance that I am going to run more than one locomotive at a time on a layout, I will use Digital Command Control (DCC). I have heard many people complain that DCC is difficult, to expensive and takes to much time to learn/setup. Granted DC is simple to hookup to a loop of track. The locomotive is already setup to run and it takes a knob and a switch. But if you want to run more than one train at a time on DC, you have a lot of work to do. The work is not just in setting up block control but you must work to run the trains by throwing switches to power blocks as you move around the layout.
In this article, I plan to show what DCC equipment and configuration I use. The setup is much easier than it appears and once it is setup, it is very mobile and always available. To replicate what I have done you will need and probably already have:
- Computer (can be an old machine or a laptop)
- Wireless (most home networks have this)
- Smart Device (phone or tablet)
Keep in mind that these items are NOT dedicated to serving your layout. I use the household computer everyone else uses. The wireless came with my internet DSL service and I use the smart phone I have for daily use. These were all things that are quite common in most households these days. Sometimes I borrow (well maybe steal) my kids iPod Touch to run my trains if I need an extra throttle.
The following article assumes that you are using Windows 7. The software outlined will run on many versions of Windows and even Linux.
DCC Basics
I will not attempt to describe all the technical bits about every component of a DCC setup. We will keep this simple and just focus on what is necessary. If you want to read more of the technical side of things, you can get that at http://www.dccwiki.com. Here we will look at the basics as they apply to the small layout. We are going to assume that the maximum number of trains running at any given time will be four. This includes all locomotives pulling power, even if they are just sitting and not moving. If it is receiving track power we have to consider it running.
A DCC “system” can be defined as “a set of components packaged together”. The products of main stream providers of DCC (like NCE, Digitrax, Lenz, ect..) sell “systems” and components. The most basic components of any DCC setup (notice I did not say “system”) are:
- Command Station
- Booster
- Throttle
- Decoder
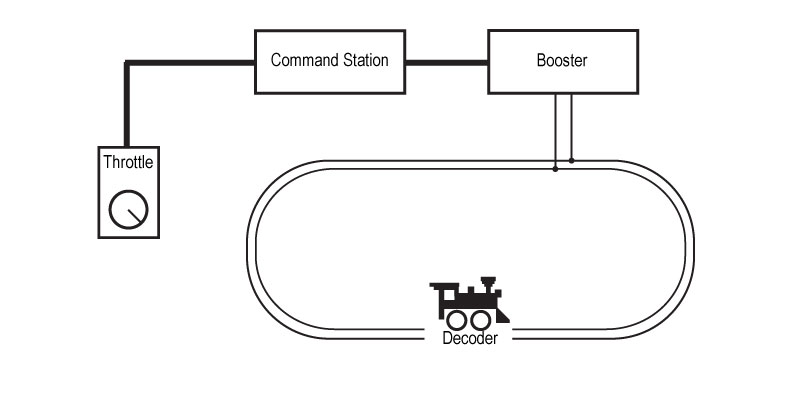
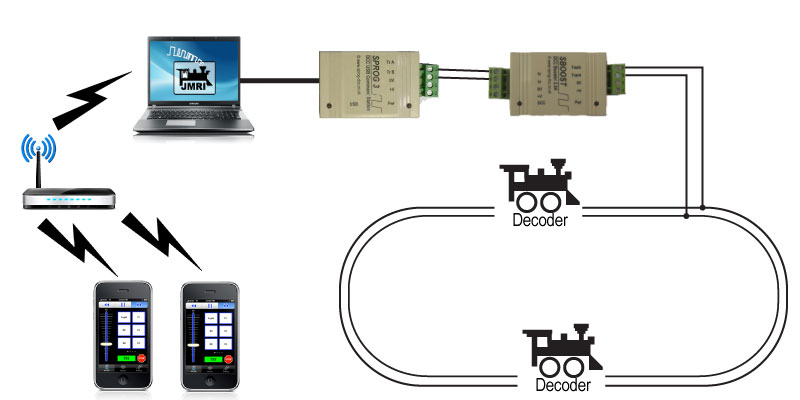
The illustration below shows the relationship of these components in the simplest configuration.
Command Station
The Command Station is the brains of the system and is a computer of sorts. all the major manufacturers make and sell Command Stations. Many command stations include the booster. For the small layout, full size commercial systems can be too much, and in my humble opinion, can be overly complex.
Since a command station is a computer of sorts, why not use a real computer? Most of us have computers and some may even have old ones doing nothing. Why not put it to use running trains?
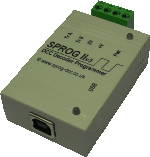
 For my command station I use a computer, the Java Model Railroad Interface (JMRI) software and a little device called a SPROG. JMRI is free and the SPROG currently lists for $105.00 USD (includes power supply and shipping). Compared to other starter DCC Command Stations (averaging $200 for starter sets) this is very affordable.
JMRI is licensed under the Free Software Foundation’s “GNU General Public License” which means it is free for any hobbyist to use. JMRI is capable of all Command Station functions and meets NMRA DCC standards for output. This means it will work with any decoder that also meets that specification (and most do).
Before connecting the SPROG to your computer you need to install JMRI. Download the JMRI that is appropriate for you. I always select the latest production version. Downloads are available for Windows, MAC and Linux. Although the install is pretty easy, make sure to follow the installation instructions to avoid issues. There is a Yahoo JMRI Group with lots of other modelers who are more than willing to assist with any issues you may encounter.
Once JMRI is installed, it needs a device to convert the signal into two wires for the rails. This is where the SPROG comes in. It connects to your USB port and then to the rails. The SPROG comes with a power supply and all connections are clearly marked on the front of the SPROG. Setup the SPROG and install the drivers as outlined in the SPROG Instructions. The SPROG comes with a disc that contains all the drivers required for the SPROG. Again, follow the supplied instructions.
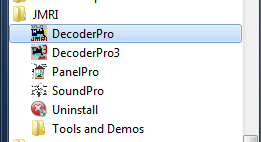
Once the SPROG is installed, start JMRI DecoderPro. You will see a screen similar to the following.
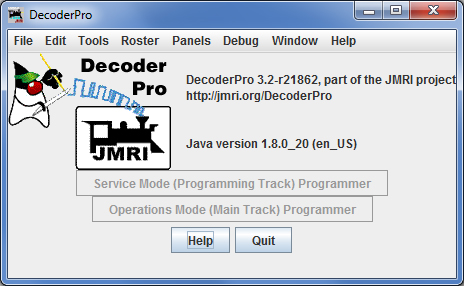
To connect JMRI to the SPROG, you need to tell JMRI that you have a SPROG. The instructions for this are outlined in the SPROG documentation but for simplicity all you need to do is go to Edit->Preferences and click connections. In the drop-down, under System Manufacturer, select SPROG DCC and under system connection select SPROG. The final selection is Serial Port. You will most likly have more than one selection here depending on your version of software and computer type. On my Windows 7 machine Com 5 worked. If you make a selection and it does not connect to the SPROG, come back to this setting and choose the next one. When done your screen should look similar to the following.
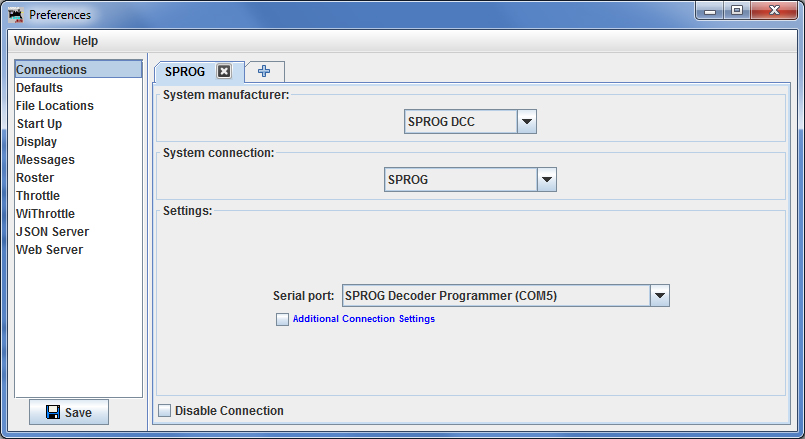
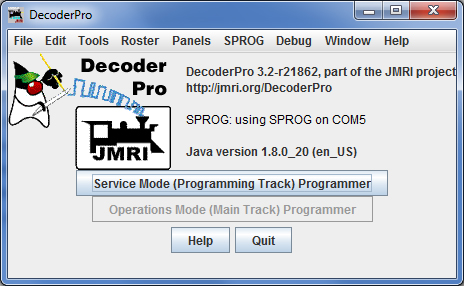
At this point save the settings and JMRI will reset. The JMRI screen will show the connection and you should be all set to program and run a single locomotive.
Throttle
JMRI comes with throttles to run trains from your computer screen. This is fine if you are sitting at a bench and testing, but I prefer a walk around throttle.
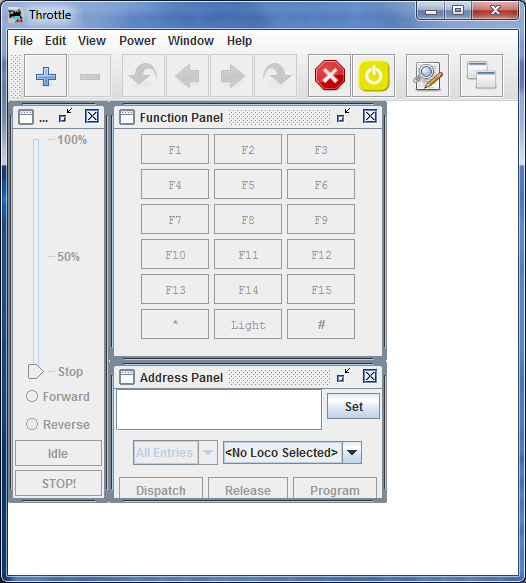
I use the WiFi Throttle app that is available on both IOS (WiThrottle) and Android (Engine Driver). The app works on any smart device that uses IOS such as iPhone, iPad and iPod Touch or Android devices like smart phones and tablets. A WiFi network (most home wireless networks have this) will also be required. The app comes with a free lite version or you can purchase the full app if you want extra features. I ran on the free version for over a year before I paid the $9.99 for the full app.
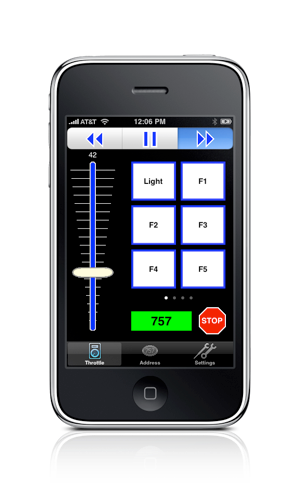
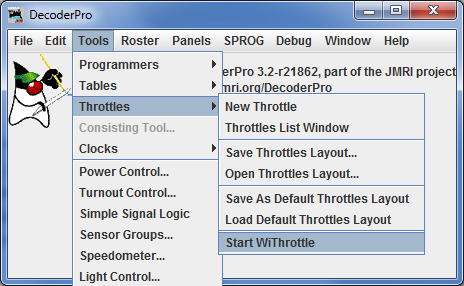
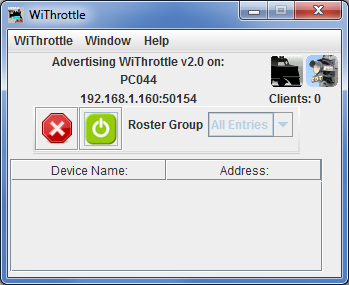
To setup this feature, the computer with JMRI installed needs to be on a network that has a wireless (WiFi) router (NOTE: the computer does not have to use the WiFi, just be on the same network with it). Within the JMRI DecoderPro program you will need to open devices and active the WiThrottle Server located under throttles. Once activated, start the app on the smart device and the app should automatically find it. For more detailed instructions refer to the JMRI web site.
This tool allows any smart device with the app work as a DCC throttle. I have been upgrading my iPhone every two years and I keep my old phones just to use for running trains. Since many other people I know have smart phones too, I setup their phone with the free app and let them run trains when they visit.
Booster
The booster is sometimes referred to as a “Power Station” and is responsible for combining the intelligence from the command station with the power of the power supply. So far the setup above is only powerful enough to run a single locomotive at best. To do more we need a booster.
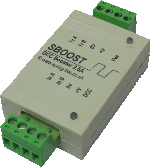
For the small layout running just four trains, a single booster should be sufficient. We could use a commercial booster with the SPROG but they can be expensive. The SBOOST from the makers of the SPROG is more than enough for our needs and at $100 it costs much less than other commercial boosters. Although one booster is more than enough for a small layout, those who choose to also use the same equipment on a larger layout can run multiple boosters. See the SBOOST user manual for more information for larger layouts.
Decoder
Decoders come in a variety of sizes, power and abilities. The one thing I recommend is that the decoder be as NMRA compliant as possible. Some sound decoders require special equipment to program them. I stay away from proprietary software and hardware as much as possible.
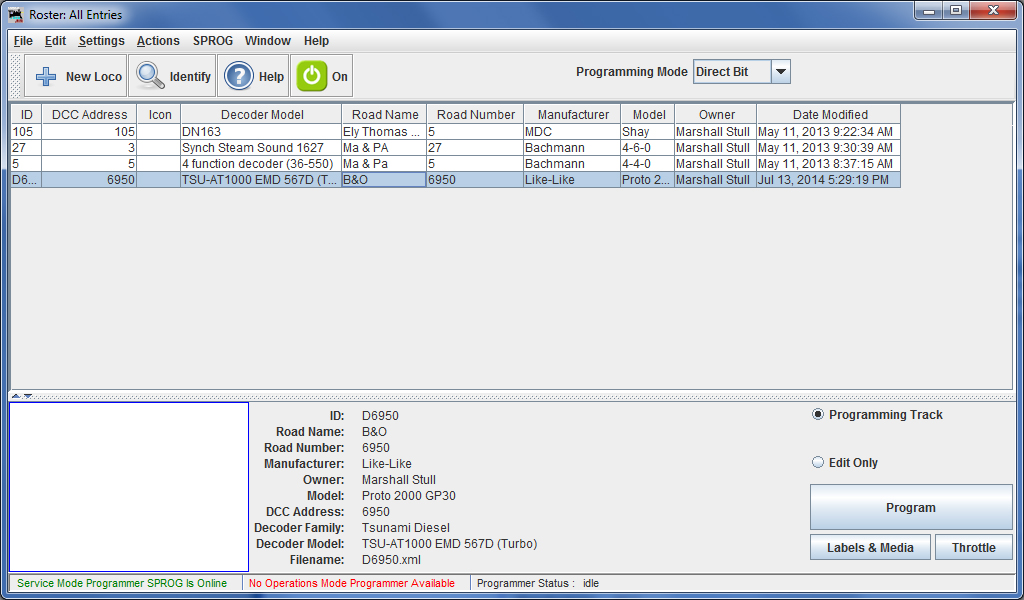
Many people are put off when it comes to programming decoders. Having to figure out what a CV is and then all the steps to program them is a royal pain. I have always used JMRI for programming decoders and cannot imagine having to do it any other way. JMRI DecoderPro will read all the settings from your decoder and display them in an organized manner. You can then review them (most with simple descriptions) and adjust accordingly. The best thing is that DecoderPro saves your settings and builds a list (roster) of all of your locomotives and their settings.
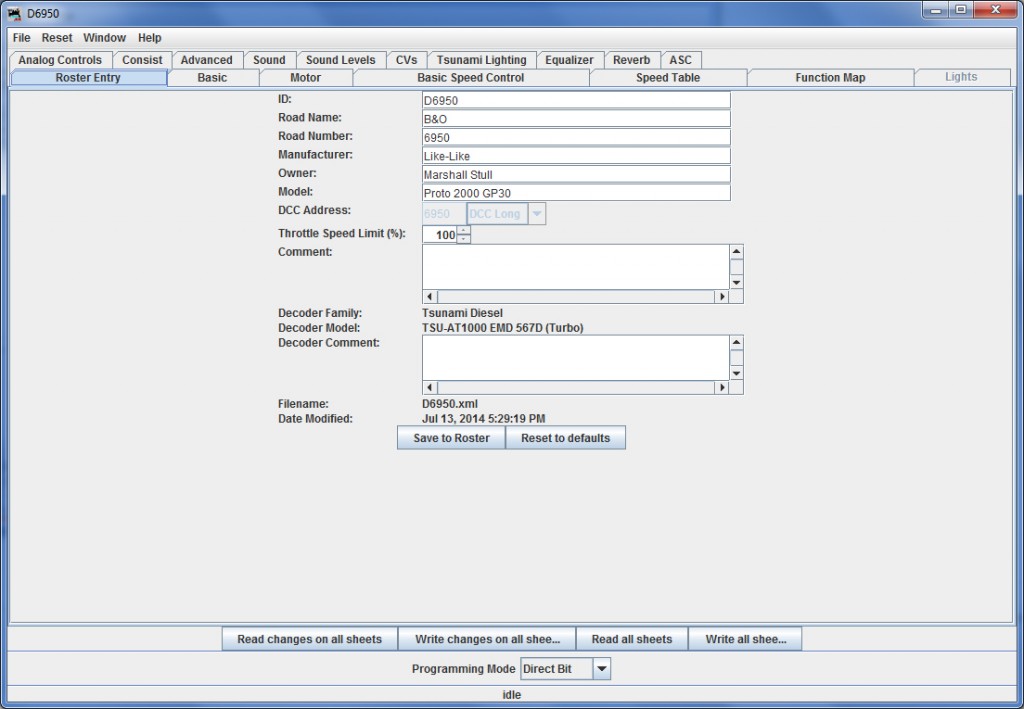
The abilities of the programming with JMRI DecoderPro are far beyond the scope of this article. More information and detailed how-to’s can be found on the JMRI web site and in the Yahoo JMRI User Group. My personal recommendation is NEVER PROGRAM WITHOUT IT!
Summary
For me the JMRI/SPROG DCC setup is perfect. I use it on my large home layout with two boosters and on my small modular layouts with or without the booster. For the cost ($200.00 total for me) it gave me wireless control, easy setup and I can manage and save all the settings for my locomotives. You can expect to pay significantly more for a commercial system with radio control.
As a final thought, I have recently been experimenting with using this same setup to run Deadrail (use batteries and eliminate track power). I am so impressed with the results so far that I plan on converting all of my HO and larger scale layouts to some form of Deadrail. The details on this will be featured in an up-coming article. In the mean time see my other article Deadrail for Free-mo on my first Deadrail test using JMRI/SPROG and the Tam Valley DRS1.
Thanks for this! I’m currently planning an N-Scale shelf switcher and this is much more cost effective than buying the USB adapter for my Power Cab in order to use my phone as a throttle. So the NCE system has been sold and a sprog ordered. Besides, the Power Cab isn’t compatible with the JMRI virtual sound decoder so this solves that problem too.
I also had an NCE system (ProCab) and sold it. I think NCE is one of the better DCC systems out there but it just could not beat the flexibility of the JMRI/SPOG setup.
If you have any issues, feel free to ask for help here.
Cool, I’ll keep that in mind! And instead of a laptop, I’m thinking of using my Raspberry Pi that’s been collecting dust for 2 years. That way I can tuck everything behind the fascia and maybe wire it all to a single on/off switch to keep things neat and self-contained.
I really want to know how the Raspberry Pi works out! I was wondering if it was capable.
It took the better part of a day but I’ve got a Raspberry Pi working beautifully with the Sprog. I plan a full write up soon for the JMRI site. For any help with this, send a message and I’d be more than happy to help.
What is the minimum item to get from SPROG? Can SPROG3 work with N-scale / Z-Scale? Thanks
I suggest SPROG3, it is the same as the SPROG2 but with power to run a small layout and not just programming. It has sufficient power to run a few locomotives N and Z without issue. If your layout is larger, split the layout into districts and add boosters.
Marshall – thanks for this! It’s exactly what I’ve been looking for. I got out of the hobby about 10 years ago and gave all my Digitrax equipment away, now getting back involved I saw no sense in investing in dedicated throttles with the proliferation of iPads and iPhones in my house. I no longer have a dedicated GPS unit for my car, or MP3 player, or pocket calendar or address book or E-book reader, it makes no sense to have dedicated (expensive) hardware to run my trains.
For the time being as I build a couple Free-Mo modules my existing MacBook computer will work out fine. I looked at the Raspberry Pi solution for something more “Dedicated” so that I don’t have to keep moving the computer down to the basement, but I have also seen some really inexpensive tablet computers. As of this writing (Aug 2015) Best Buy #2077079 is a Windows 8 Tablet selling for $129.99 that looks like it could easily handle the JMRI hosting duties, and at a lot less hassle than learning Linux.
SPROG-3 is on its way (this model eliminates the need for the separate “Booster”) and looking forward to re-immersing myself in this great hobby.
This is a great article, I am also looking at running the sprog but needed more information on it. I’ve used a dedicated DCC control center before but the cost is too much when including a PC add on.
So I am going with the sprog but still need to decide on the PC version or the Pi version. I can’t see much benefit on the Pi version. i know it is slow to start up. There maybe more you can add with further programming with the Pi but this could be done separately. i also have spent year with Pi’s and they are not always that reliable. Power issues can be a problem.
Another concern is the amount of things the sprog can run. With the sprog 3 i assume i can run more than 3 locos but what about the amount of accessories I can run.
I will add to this if i find out the information. at the moment I think i will be ordering the sprog3 PC version and a Signalist SC2 controller for the points to practice on.
The SPOG 3 has a higher power booster for layout control of a few locomotives. If you are going to do more locomotives on the layout at the same time you will need to add boosters just like any other DCC system.
I have both a PC and a Pi. I used the latest level Pi and found it actually booted pretty quick. The Pi is fine if it will not be used for programming. For programming I prefer a PC. I just find it easier to run and manage the rest of the features in JMRI.
Thanks for the reply. I did not know I could use boosters with the SPROG 3 this will allow me to grow the controller with the layout as I get more stock. i will be using the Signalist-SC2 controllers for the turnouts with seperate power supply so the Sprog will not have this loading.
Do you know how many accessories i can add to the Sprog, like turnouts and signals. Is it unlimited. Also can it handle track occupied inputs to control the layout automatically. I cannot find much info on this .
I have never used the SPROG for both Train and accessory control at the same time. In theory, you should just put the accessories on their own booster(s) and you should be good to go. The key with adding more to any DCC system is to divide it up with each segment having its own booster.
I have got the SPROG 2 and SC” now and have been trying to get the SC2 to operate a turn out all weekend with no success. At the moment I can use DecoderPro to change the CV settings but cannot get DecoderPro or PanelPro to operate the servo when clicking on thrown/closed on the turn out control window. I have down loaded TrainController by Railroad.co and it works ok on this with the SPROG2.
Have you used the SC2 for turnout control with JMRI. If so am I doing something wrong.
I have not used it for turnout control. I suggest you signup with the JMRI user group (https://beta.groups.yahoo.com/neo/groups/jmriusers/info) and post the question there. They are usually very quick to assist.
Thank you for this, in 2018 I have been struggling to find a beginners guide for a simple DCC/wireless setup and this post from 2014 is the best I have found.
Question, if anyone sees this…what about the MRC Prodigy Express with wifi module for about the same price, $200? Any arguments for or against either system four years after this article? Thanks!
OK so it’s 2023, I just read your hit dcc wiring for a small layout. I like the looks of it. I have a small N scale layout but will be getting DCC Equipped locos for running in a club with DCC. My Grandson is a computer genius so I will have no problems there.
Yes, that article was written in 2014 and things have changed a little. All the tools are still out there but the price of the SPROG has gone up.Its still cheap compared to Digitrax NCE and the like. On the bright side, there are many more options for throttles in the form of Apps and Wifi like the Proto Throttle.