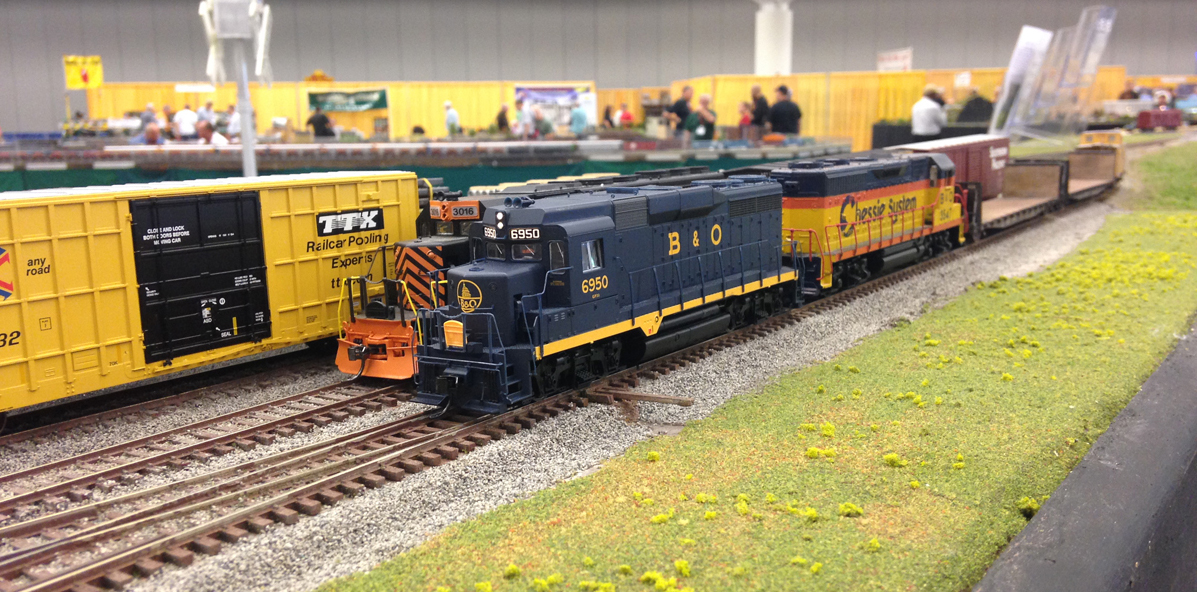
In the prior article, Deadrail for Free-mo, I gave a short preview of a battery locomotive setup that I would test at the upcoming Free-mo event at the National Train Show (NTS) in Cleveland OH. In this article we will examine the components and methods used to build and control the locomotives in the video.
Since that video was made, I have used this locomotive setup at two separate Free-mo events, the NTS in Cleveland and an NMRA Michiana Education & Technical Conference in Middlebury Indiana. At each event, I was able to run the locomotives for up to three hours before having to swap out the batteries. With a charge time of about an hour, I was able to keep running while charging another and I kept a third ready and available. This allowed me to do quick battery changes and have very little down time.
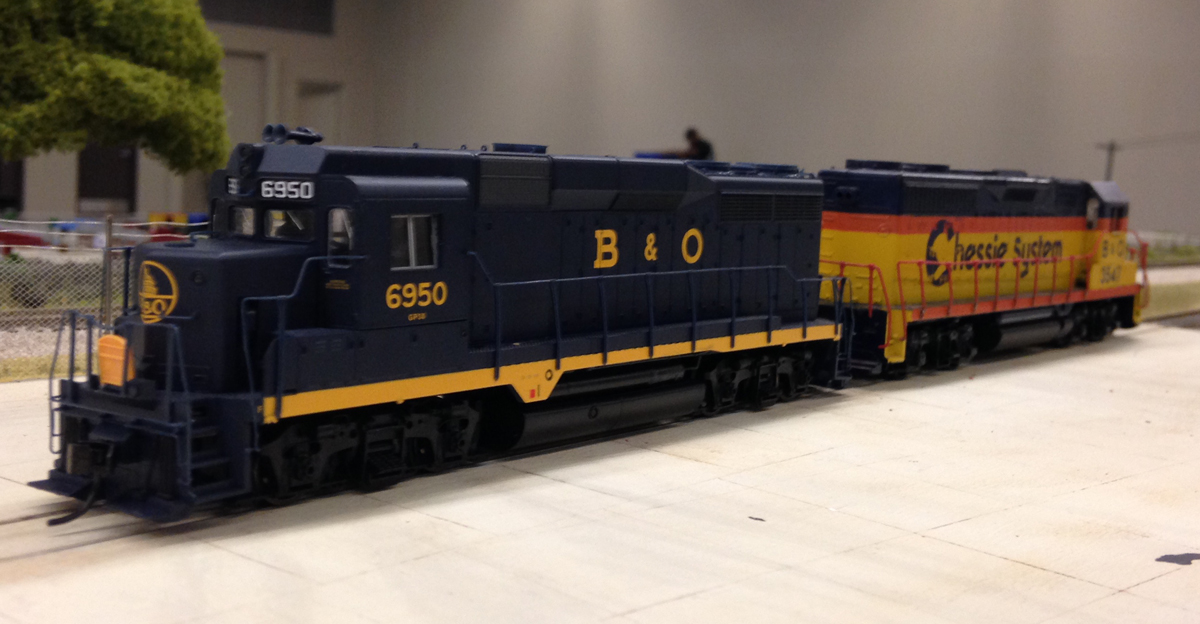
NOTE: For simplicity and ease of setup, I elected to use a two unit setup. One powered and one dummy for the battery. If I had a cab unit (with full-width carbody), I would have tried to fit everything in one locomotive. Even so, the use of two locomotives looked very prototypical.
Some may ask, “Why go to batteries at all?” I recommend trying a battery locomotive to see how smooth the locomotive will run. I have found that 90% of the issues with running ability of a given locomotive disappear as soon as track pickup is eliminated. Bad runners smooth right out and run flawlessly. The setup presented here, after conversion, was able to run in speed step 1 with a train of 10+ cars and just creep along. Try that with any rail pickup system. The battery pack I used was only 7.4 volts. I have found that with batteries, you do not need 12 volts. 7.4 volts ran the locomotive at a smooth prototypical speed.
Drive Locomotive
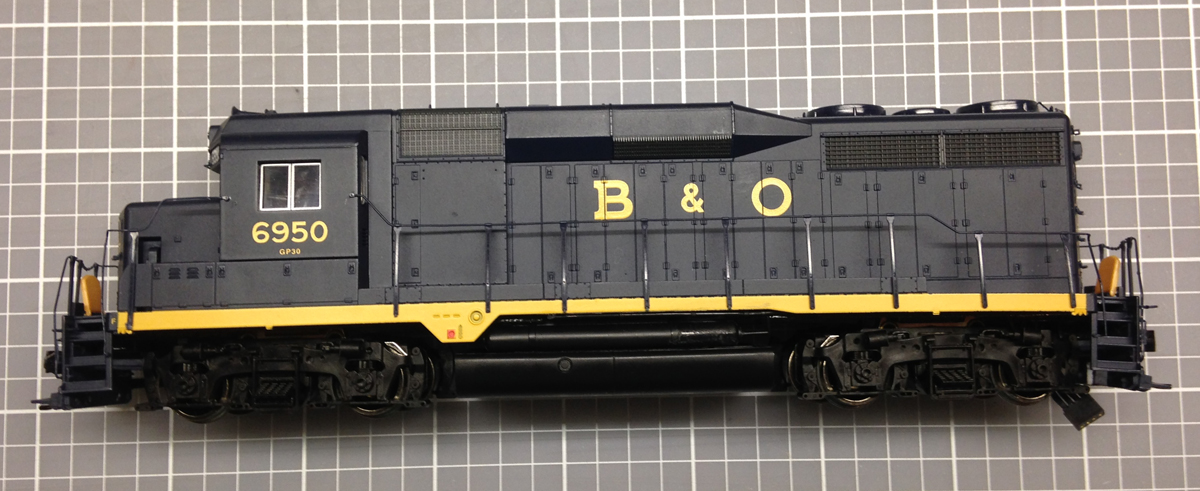
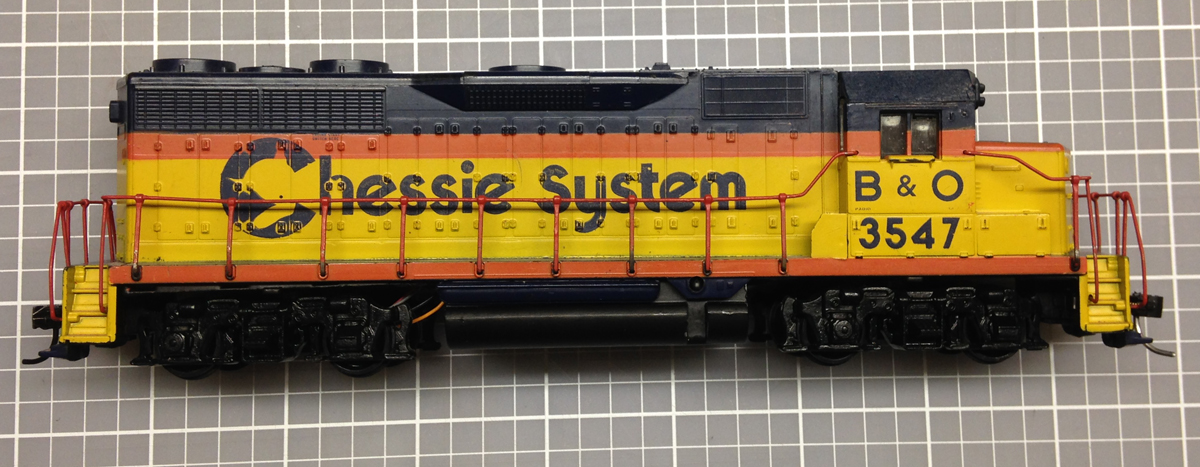
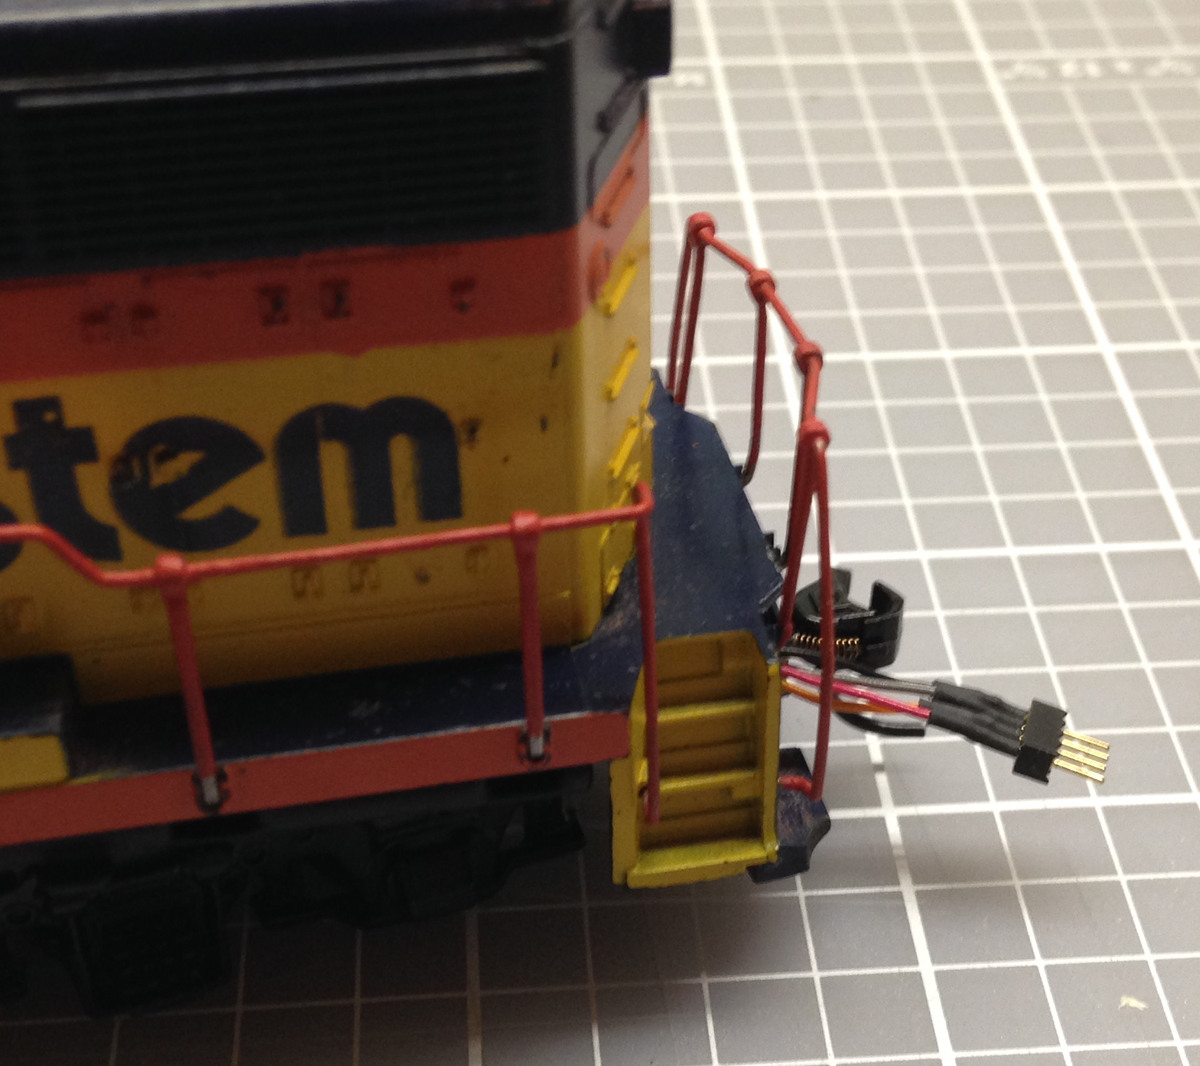
The drive locomotive is a Life-Like Proto 2000 GP30. The motor and drive line are stock with the exception of axle gear replacement (a known problem on these locomotives). The stock electrical board has been replaced with a Tsunami TSU-1000 Digital Sound Decoder. A portion of the rear weight was removed to make room for a DS1425-8 Speaker. The lamps have been replaced with LEDS.
The only addition to prepare the locomotive specifically for the battery and wireless setup was the addition of a pigtail to connect the unit to the dummy unit that would hold the battery pack and receiver. I also added a second plug to the old track pickup wires. In this way the locomotive can easily be changed over to rail power.

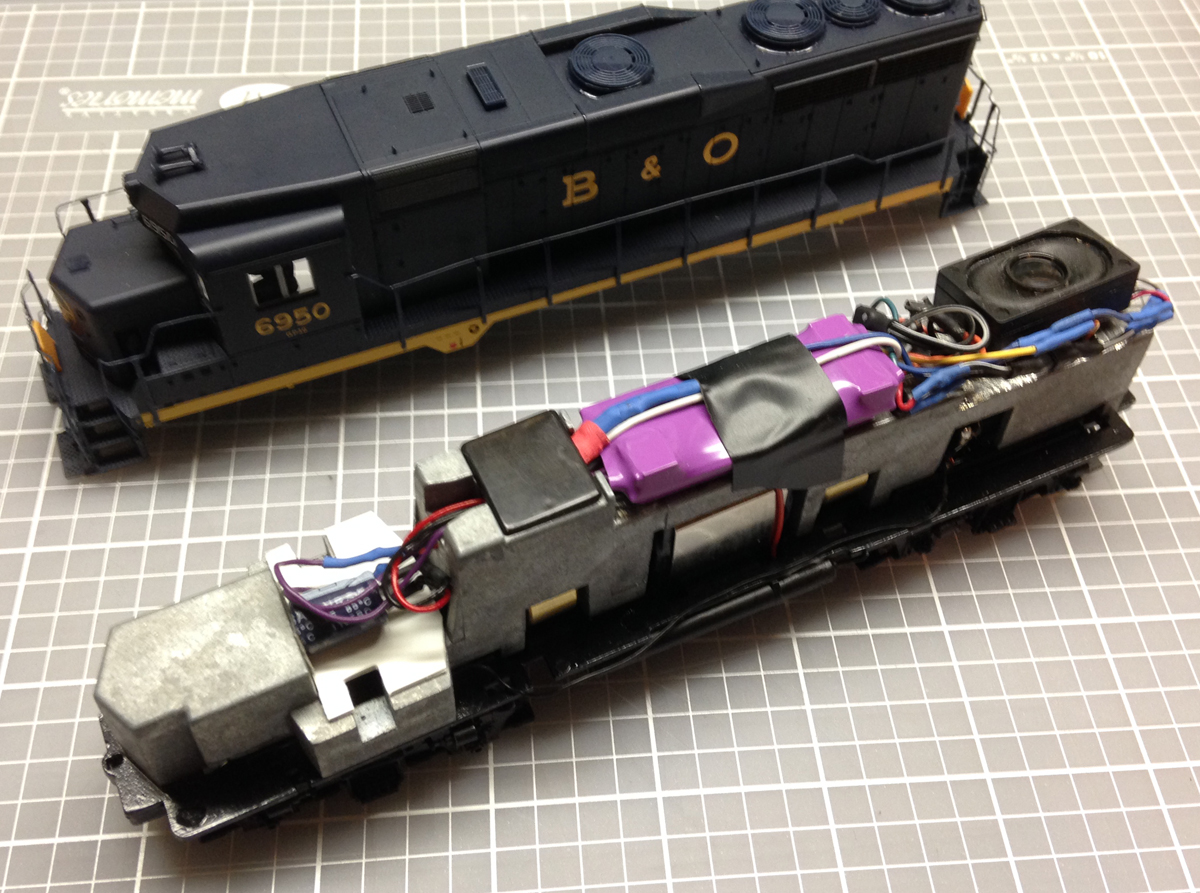
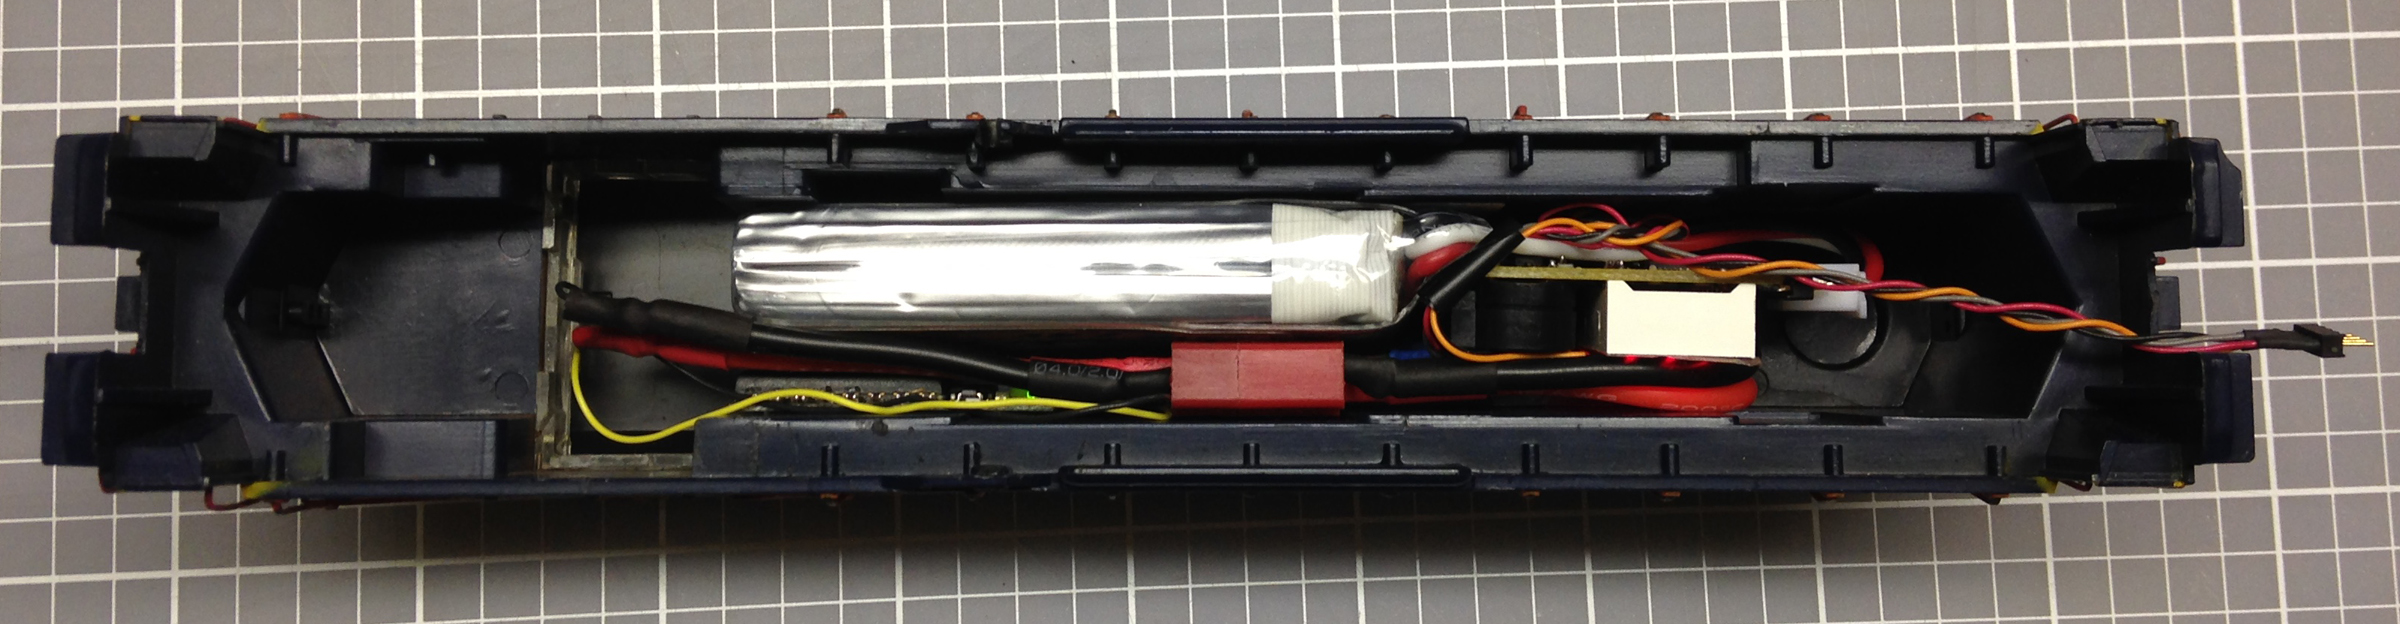
Dummy/Battery Locomotive
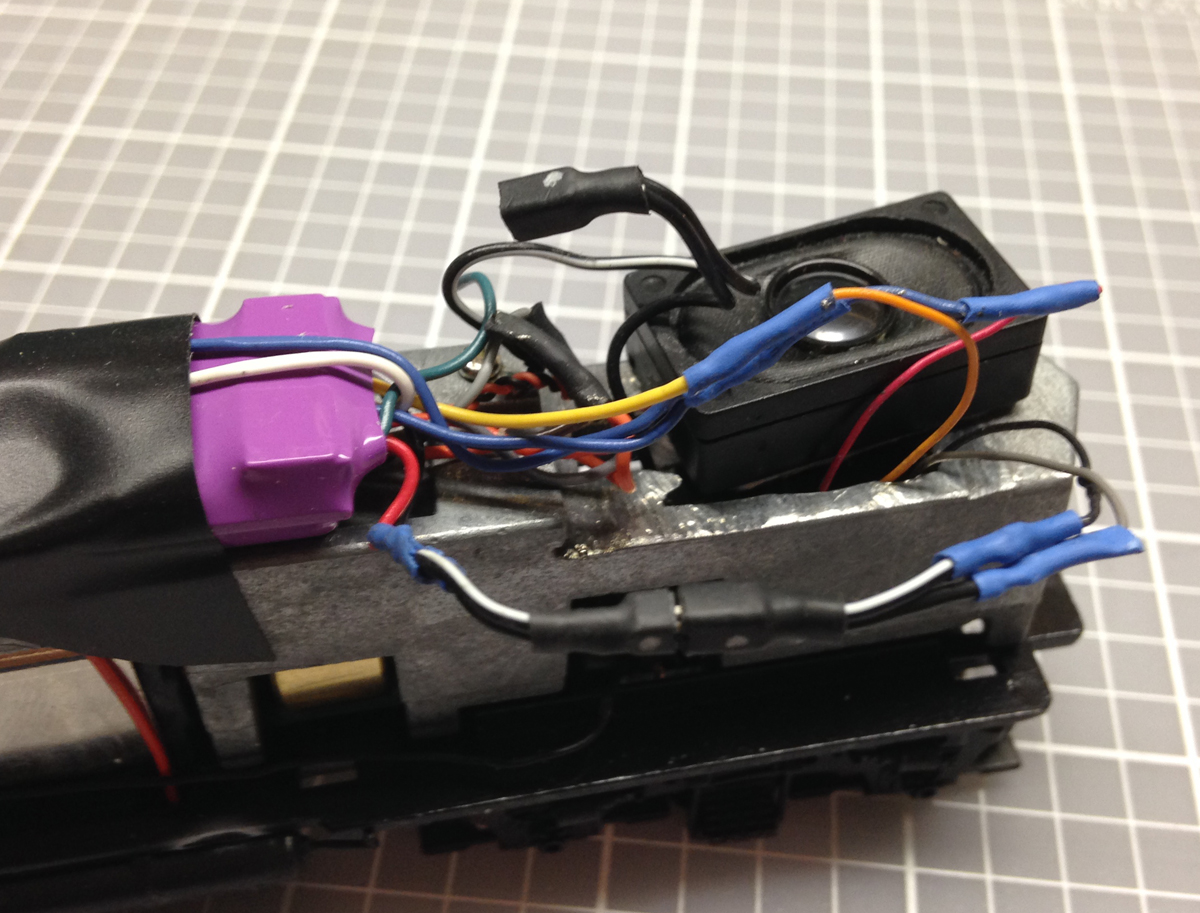
For the Dummy/Battery locomotive, I used an old blue box Athearn GP35 dummy locomotive. I purchased it very cheap from E-bay just for this setup. The locomotive had clearly seen better days, but for a test it worked just fine. The prior owner had added a lot of weight to the interior of the locomotive. I stripped all weight from the locomotive except the weight in the fuel tank.
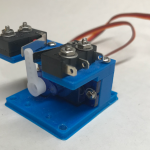
This provided a very generous area for an off the shelf RC battery pack, DRS1 receiver and an alarm to tell me when the battery was low.
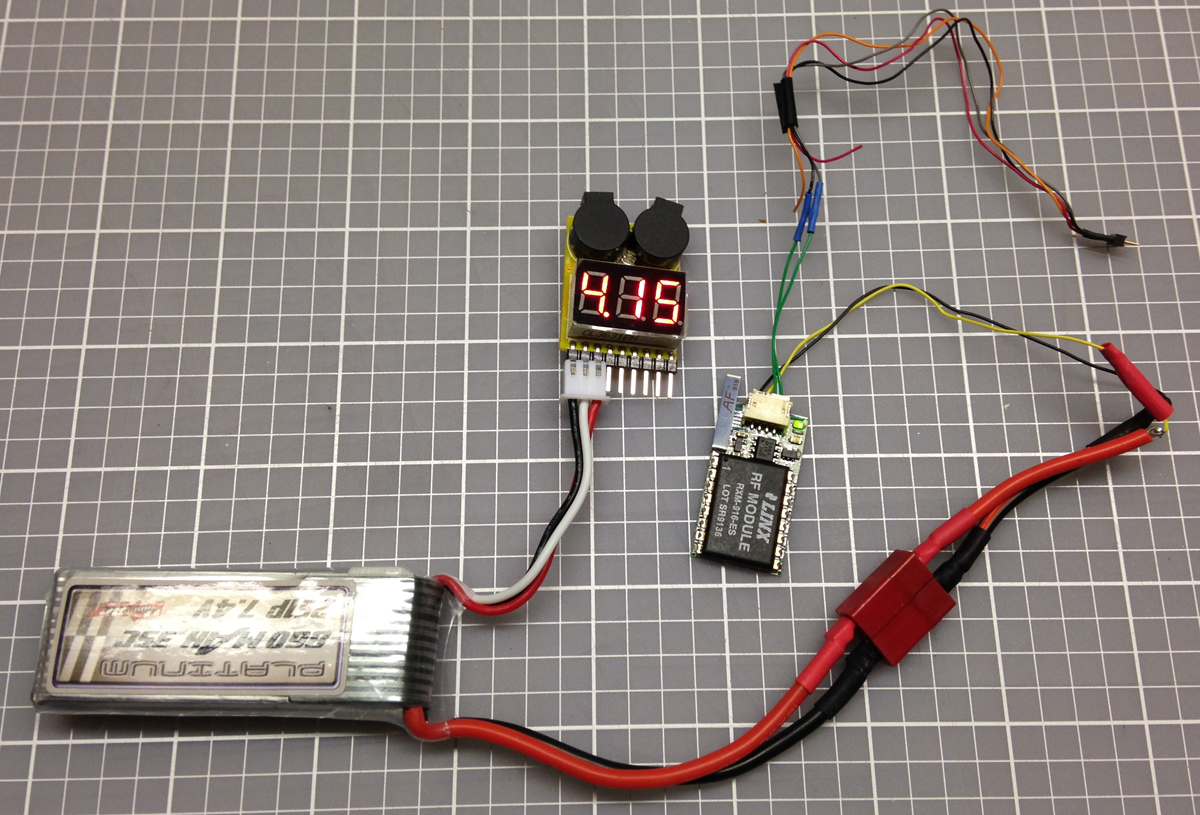
The battery I used was an 860mha 7.4V 35C battery purchased at a local RC hobby shop. The battery came with standard connectors for connection to an RC vehicle and charging. Although these connectors were large, retaining them made charging simple.
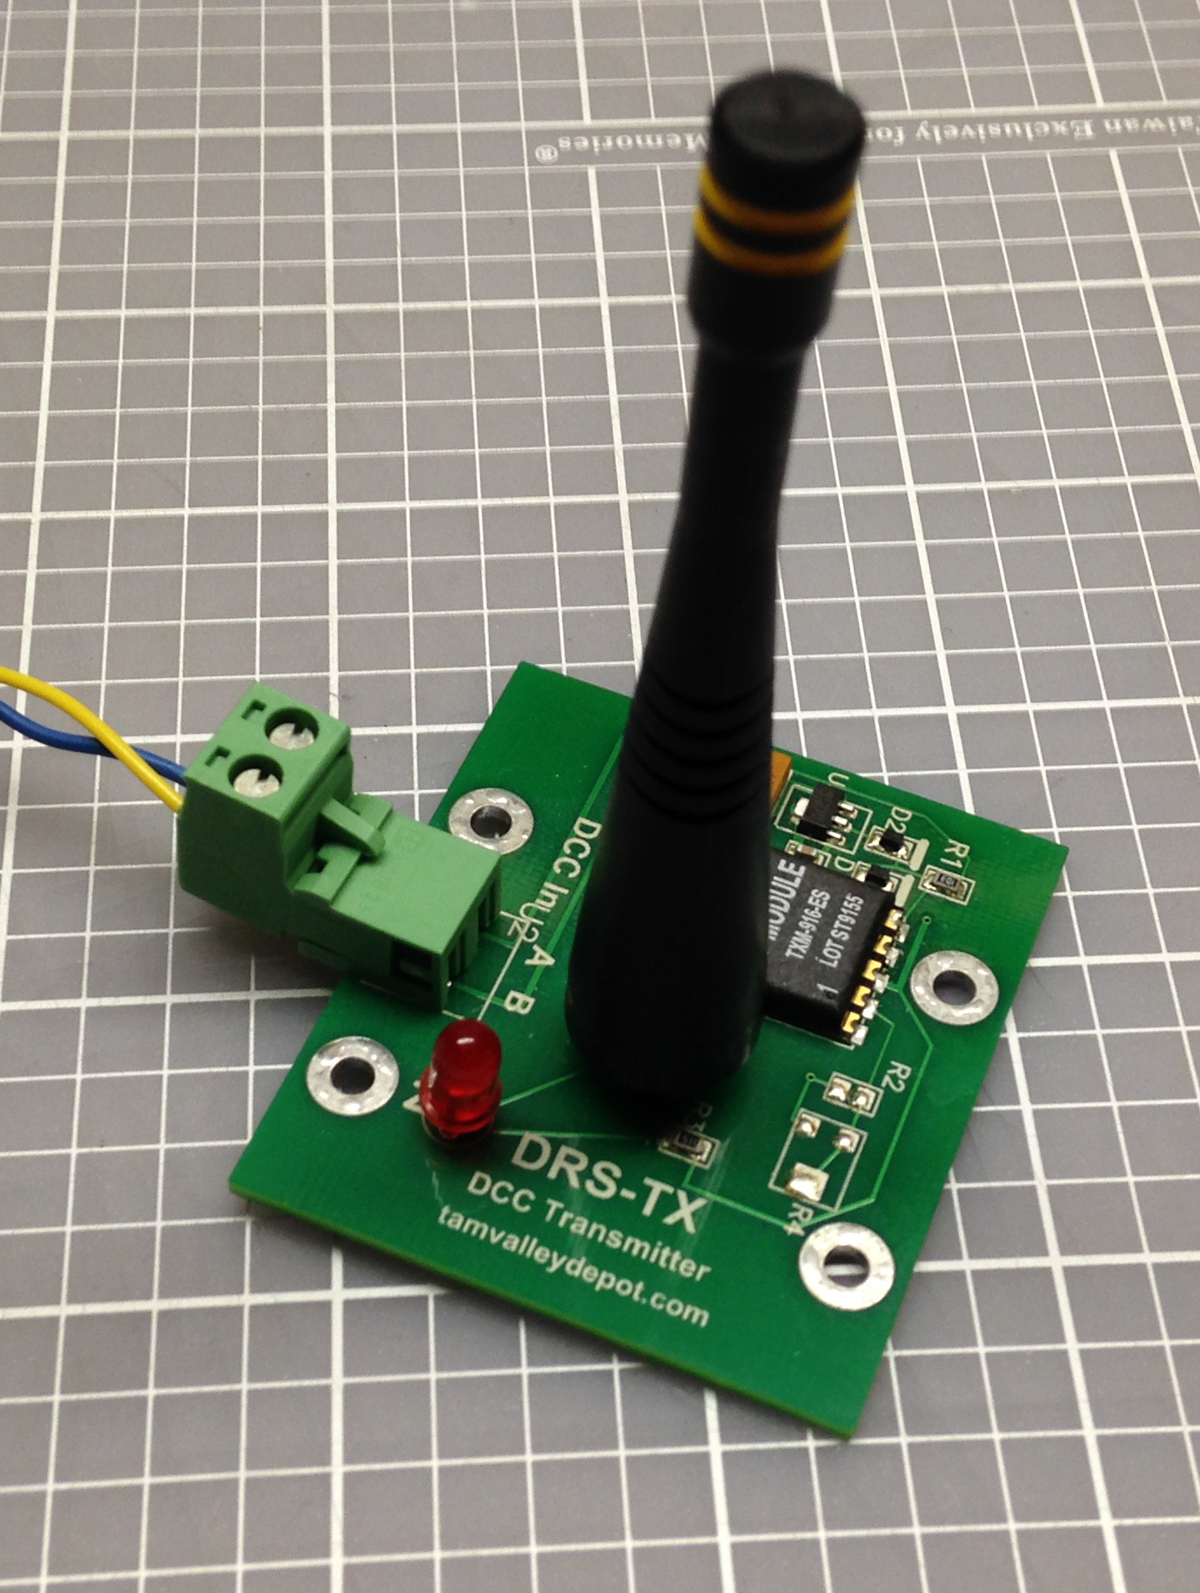
For the wireless receiver, I used a Tam Valley Depot DRS1 system. The unit receives the DCC signal, marries it to the power source (battery) and then passes it through a connector to the GP30 Drive Locomotive.
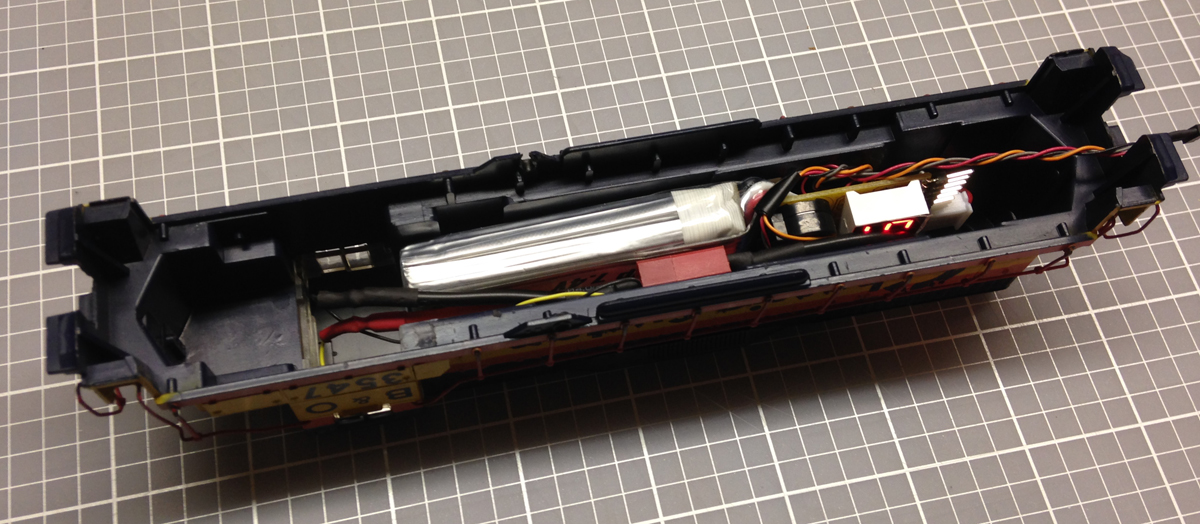
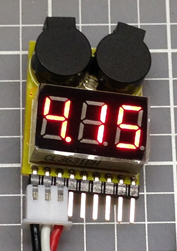
To make sure I did not run the batteries too low, I used an alarm circuit board that is commonly used in RC helicopters. This device will sound an audible alarm when the battery has reached a preset low voltage. I opted for this over a traditional board (which would just shut down) so I could identify issues vs low batteries.
Once the batteries are in place and the unit re-assembled, it was just a matter of connecting the pigtails from each locomotive and placing them on the track.
Transmitter and Radio Control
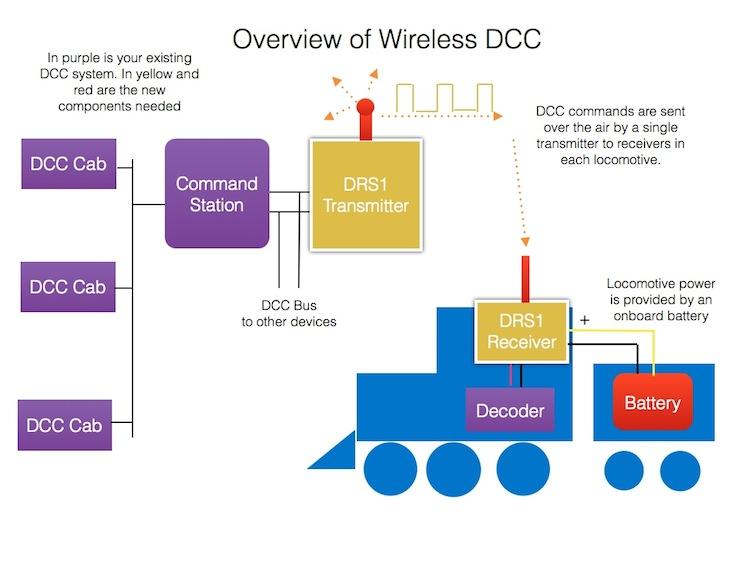
The Transmitter is the second part of the Tam Valley Depot DRS1 system. The transmitter is a simple board that connects to the DCC command station (no booster). It transmits the DCC signal directly to the receiver in the dummy locomotive. It will also connect to ANY DCC command station/system. To make my system simple and transportable, I used the system described in my prior article Low Cost/Low Effort DCC for the Small Layout. Since the signal is handled by the transmitter and the battery provides the power, boosters and network (Loconet) are NOT required.
Batteries
The full topic of batteries is WAY beyond the scope of this article. Even so some basics need to be covered. I strongly suggest a trip to the local RC hobby shop (more of those than train shops these days). When I tell them I am trying to RC trains, they always say “COOL” and provide all kinds of help. For more detailed information you might want to try Battery University’s web site.
Supply List
Drive Locomotive = LifeLike P2K (gears replaced)
Dummy Loco = Old Athearn GP35
Deadrail System = Tam Valley (http://www.tamvalleydepot.com/)
Decoder = Tsunami (http://www.soundtraxx.com/dsd/tsunami/1000.php)
Battery = 860mha 7.4V 35C (local RC hobby shop)
Protection = Venom Low Voltage Monitor (http://www.amazon.com/Venom-Voltage-Monitor-LiPO-Batteries/dp/B0064SHG0Y)
What are LiPo batteries?
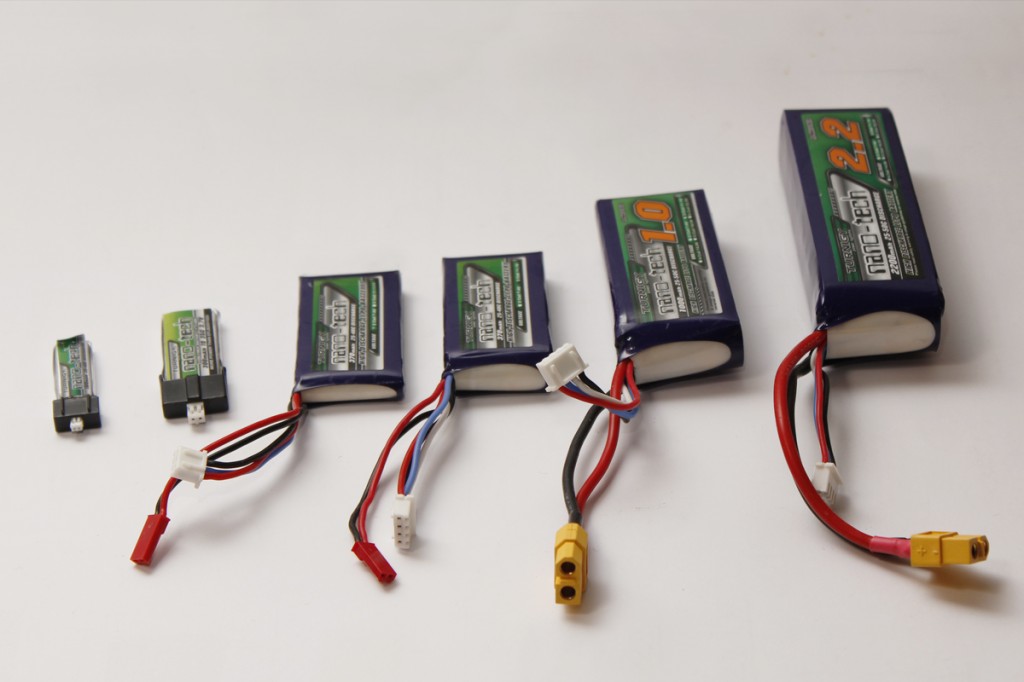
LiPo batteries (short for Lithium Polymer) are a type of rechargeable battery that has taken the electric RC world by storm, especially for planes and helicopters.
RC LiPo batteries have three main things going for them that make them the perfect battery choice for RC over conventional rechargeable battery types such as NiCad, or NiMH.
- RC LiPo batteries are light weight and can be made in almost any shape and size.
- RC LiPo batteries have large capacities, meaning they hold lots of power in a small package.
- RC LiPo batteries have high discharge rates to power the most demanding electric motors.
- In short, LiPo’s provide high energy storage to weight ratios in an endless variety of shapes and sizes.
It wasn’t until LiPo battery technology arrived on the scene that batteries and RC became small enough for smaller trains.
There are a few down sides with RC LiPo batteries however; once again proving there is no perfect power solution.
- Although getting better, RC LiPo’s don’t last that long, perhaps only 300-400 charge cycles (much less if not cared for properly). That said, I have heard some people getting over 1000 cycles if all the rules are followed.
- Safety issues – because of the volatile electrolyte used in LiPo’s, they can burst and/or catch fire when mistreated.
- RC LiPo batteries require unique and proper care if they are going to last for any length of time more so than any other battery technology. Charging, discharging, and storage all affect the lifespan – get it wrong and a LiPo is garbage in as little as one mistake.
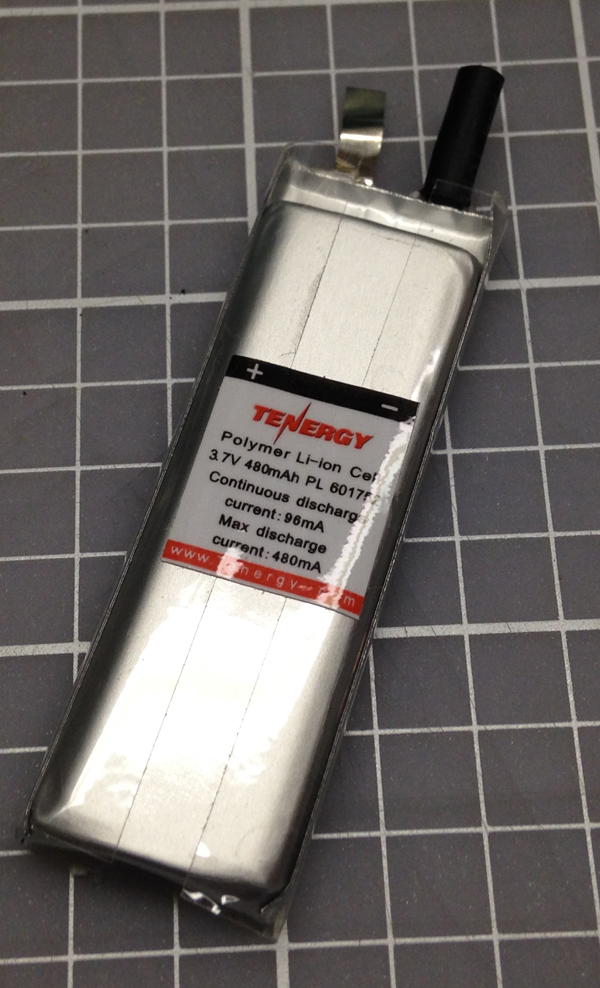
LiPo battery cells are 3.7 volts each. These cells are combined to make higher voltage batteries. The batteries I used came pre-packaged as a pack of two 3.7 volt cells to make a 7.4 volt battery. You can buy cells individually to make your own battery packs.
Charging LiPo Batteries
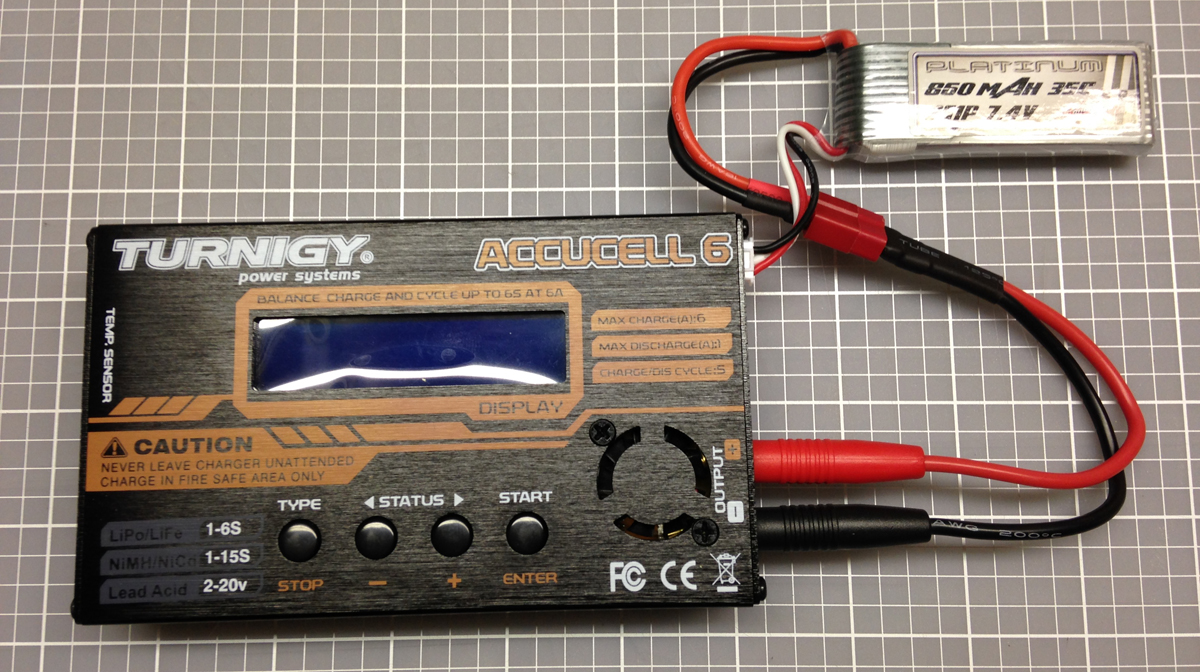
Charging RC LiPo Batteries is a topic in itself. LiPo batteries have some very different characteristics from conventional RC rechargeable battery types. Therefore, charging them correctly with a charger specifically designed for lithium chemistry batteries is critical to both the life span of the battery pack, and your safety.
Maximum Charge Voltage and Current
A 3.7 volt RC LiPo battery cell is 100% charged when it reaches 4.2 volts. Charging it past that will ruin the battery cell and possibly cause it to catch fire. This is important to understand once we start talking about Balancing RC LiPo batteries.
It is critical that you use a charger specified for LiPo batteries and select the correct voltage or cell count when charging your RC LiPo batteries. If you have a 2 cell (2S) pack you must select 7.4 volts or 2 cells on your charger. If you selected 11.1V (a 3S pack) by mistake and tried to charge your 2S pack, the pack will be destroyed and most likely catch fire. Luckily, all the better computerized chargers out there these days will warn you if you selected the wrong cell count. I charge mine in a ceramic cup to contain any possible issues and I never charge unless I am present.
All LiPo battery chargers will use the constant current / constant voltage charging method (cc/cv). All this means is that a constant current is applied to the battery during the first part of the charge cycle. As the battery voltage closes in on the 100% charge voltage, the charger will automatically start reducing the charge current and then apply a constant voltage for the remaining phase of the charge cycle. The charger will stop charging when the 100% charge voltage of the battery pack equalizes with chargers constant voltage setting (4.2 volts per cell) at this time, the charge cycle is completed. Going past that, even to 4.21 volts will shorten battery life.
RC LiPo Battery Charging Current
Selecting the correct charge current is also critical when charging RC LiPo battery packs. The golden rule here used to be “never charge a LiPo or LiIon pack greater than 1 times its capacity (1C).”
For example a 2000 mAh pack, would be charged at a maximum charge current of 2000 mA or 2.0 Amps. Never higher or the life of the pack would be reduced. If you choose a charge rate significantly higher than the 1C value, the battery will heat up and could swell, vent, or catch fire.
Once again, the four main things that shorten LiPo battery life are: HEAT, OVER-DISCHARGING (voltage & current), OVER CHARGING (voltage & current) & INADEQUATE BALANCING.
RC LiPo Battery Balancing
For a single cell (3.7 volt LiPo battery) you don’t have to worry about balancing since the battery charger will automatically stop charging when the 100% charge voltage of 4.2 volts is reached.
Balancing ensures all cells are always within about 0.01-0.03 volts per cell so over charging or discharging of one or more cells won’t ruin your battery pack, or worse become a safety issue from overcharging a cell.
You don’t have to balance your RC LiPo battery pack each time you charge it. Most will agree every 10th to 20th time is fine with a healthy battery pack. The problem is knowing if your pack is healthy, cells in older packs may become unstable? As far as I am concerned, if you have a good balancer or balancing charger, use it at every charge, or at least at every 2nd charge (I do).
RC LiPo Discharging/Usage
During use (discharge) you never want to discharge too much and drop below the minimum rating for the battery. Some LiPo batteries come with a circuit board that will automatically shut down if the minimum voltage is achieved. The small batteries that fit HO scale model railroad applications are very small and would rarely come with this device. These boards are available if you are creating your own battery pack.

I use a Venom Low Voltage Monitor created for the RC helicopter market which makes an audible alarm when the battery reaches a pre-determined voltage. This way the locomotive does not just shut down and leave me wondering. The alarm also reads out the current voltage of every cell, giving me confirmation of the charge status of the battery.
RC LiPo Storage
Leaving a full or low charge in a LiPo battery while in storage can also affect the life span of a LiPo battery. Any good charger will also have a feature for discharging/charging the battery for storage. If you do not plan on using the battery within a couple days, take the time to use the storage feature.
Summary and Additional Information
For my installation I had the luxury of using a dummy locomotive to hold a very large battery pack. The battery lasted about 3 hours under operations. I am sure a dead run at max speed would yield a lower time. Even so three hours is more than enough time to complete most operation scenarios.
Tam Valley Depot offers a book that is a good beginner’s guide to Deadrail. The book is available through their web site. In the book Duncan McRee uses a much smaller battery than I did with good results. He also fit it into an On30 locomotive that had much less room than I did in the HO setup described here.
Excellent article. I enjoyed seeing your engines run on the Free-mo setup at the NMRA Michiana Division http://michiana-nmra.com conference in Middlebury, Indiana on September 12 and 13, 2014. Your engines ran very smoothly with excellent slow speed performance. Thank you for sharing this info with model railroaders everywhere.
I love the dead rail idea. pretty much like the real deal. Tracks are tracks and the engines have their own independent propulsion. What I’d like to see is the motors go into the trucks to allow a larger battery in the chassis….AND possibly blue tooth control from a smart phone or computer eliminating all the complexities of DCC / DC currently in place. seems more time could be spent on modeling instead of learning complex electronics. lower the barriers to entry and speak to the youth of today that do everything on the smart phones.
Hi, great article, I am looking to buy LIPO for my dead rail set up, question, I heard that 12v DC motor has problems running smoothly under 9V, did you find running on 7.4V was stable ?
It ran very well on 7.4V. It may depend on the age and type of motor. An old one may need more oomph to get it going.