
Back in 2016 I wrote the article Turnout Control with Servos . Since then I have been using servos exclusively on all my layouts. I have learned much since then and have changed some of the ways I control and mount the servos. In this article I am going to update everyone on the changes and some better ways of doing things. I am also going to show how to build a Tortoise equivalent servo motor.
Servos are not for everyone! They are not “plug and play” and require extra effort to get them working (let’s call it some assembly required). Cost is usually the big motivator for using servos but I found that once the learning curve was past, servos were much more versatile than other options. Some of the pros and cons to servos include:
Pros
- Inexpensive
- Small
- Versatile
- Precise
Cons
- Extra effort/assembly required
- More pieces/components
- Sophisticated
- Noise
The inexpensive price of servos is what got me motivated to try servos. When I designed the Boat Yard, the layout required 29 turnouts. Even if I purchased Tortoise 12 packs at the lowest cost on eBay the total cost would have been around $435 (retail was about $696). This was would have been the largest expense on the layout. The chart below is a basic price comparison using retail pricing. The servo cost includes the controller, servo, mount and two micro switches.
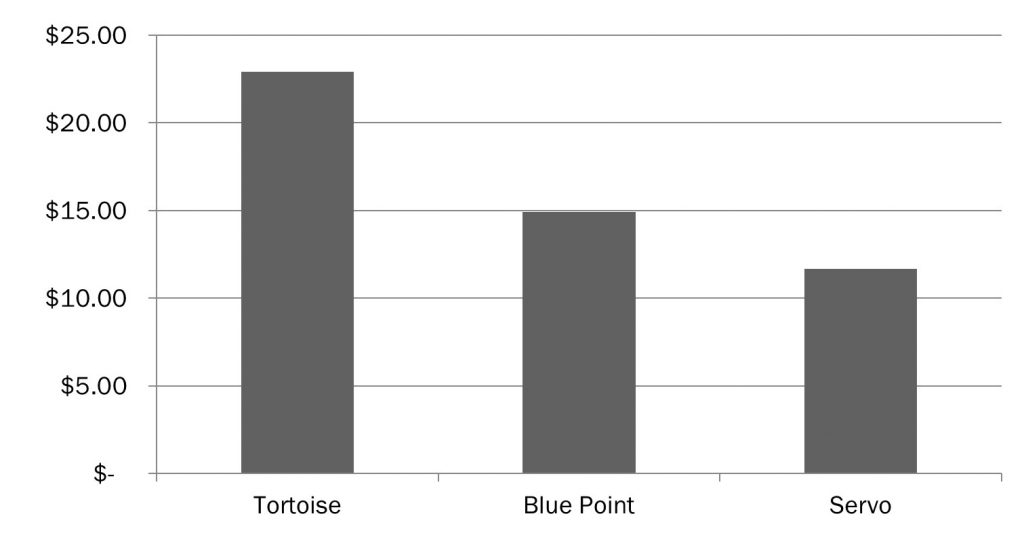
Beyond cost, I have found servos to also fit in tight spaces where a Tortoise would have been a problem. Another issue is that a Tortoise has a single speed and only stops at specific points, a servo can be adjusted to a variety of speeds and stopping points (even multiple stops within a single movement). Servos are also very precise. A servo can repeat the exact range of motion, speed and stopping points every time.
In order for a servo to do everything a Tortoise can do, we need three things; the servo, a servo controller, micro switches and a mounting bracket.
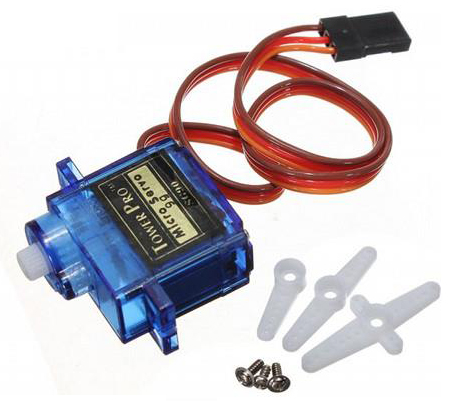
Servo
SG90 / 9G
The servo is the “motor” portion of the system.
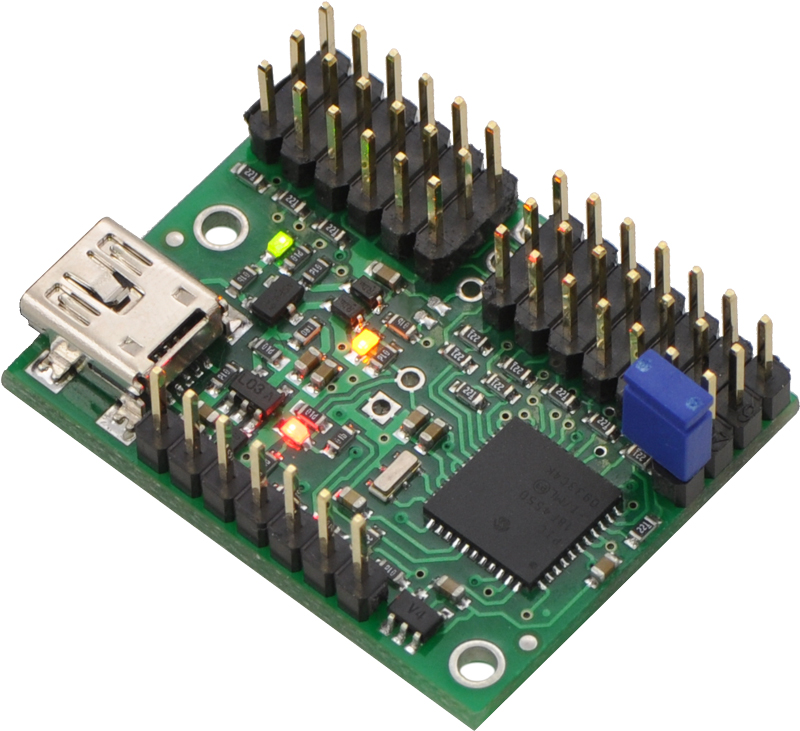
Servo Controller
12 channels
Setup varies by controller. Some controllers will require two channels; one for input and one for the servo.
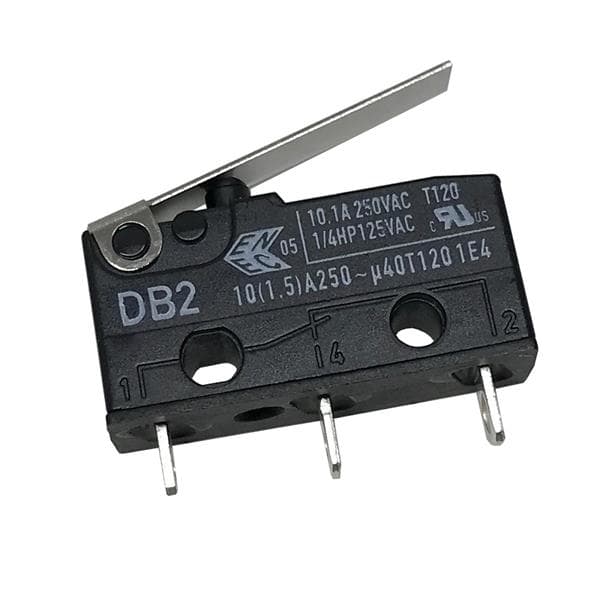
Micro Switch
DPST
Micro switches take the place of the contacts on a Tortoise. They can be used for frog polarity, signals or other electrical requirements.

Mounting Bracket
3D Printed
The image shows the mounting bracket design I choose. This design is available from Thingiverse. For those who do not have access to a 3D printer, the bracket is available from this site.
Servo Control
Although the prior article went over some of this before, I will recap some servo basics for this article. A Servo is a small device that incorporates a two wire DC motor, a gear train, a potentiometer, an integrated circuit, and an output shaft. Of the three wires that stick out from the motor casing, one is for power, one is for ground, and one is a control input line. The control input line receives a Pulse Width Modulation (PWM) signal which the servo “decodes” to perform the action required.

The following image illustrates the configuration of all the electrical components for the servo. The 9G servo uses 5V DC and is attached to the controller. The controller supplies the servo with all the required power and signal. Normally a switch will provide the input to the controller but many other possibilities could be used. The exact connections will depend on the controller you select.
Controller Selection
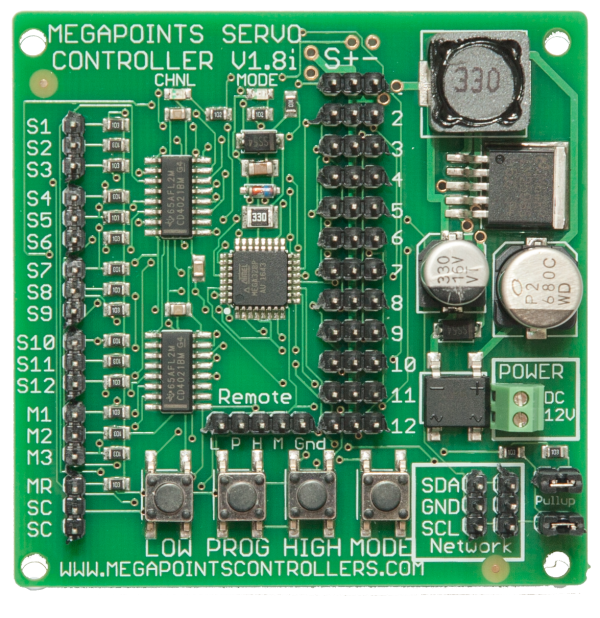
For this article I will be using the Pololu Mini Maestro 12-Channel USB Servo Controller. I do not recommend the Pololu for everyone. It requires a certain degree of understanding in electrical circuits and requires programming. The Pololu site contains lots of helpful information and sample code.
For those who wish to have an easier setup, a very good and very popular controller is the Megapoints Controller. This controller is affordable and easier to setup than the Pololu. The pros for using the Megapoints Controller include:
- Pre-programmed
- Simple setup
- Controls 12 turnouts
- Low cost per turnout
Servo Selection
I have found the best servo for turnout control is the SG90/9G servo which is also used in RC planes and other vehicles. Is a very robust and common component and it is low cost. These can be purchased easily through and number of on-line shopping sites.
Micro Switches
In order to provide the same electrical contacts as a Tortoise, I am using two SPDT 3 Terminal Sub Micro Limit Switches. Like the servos, these are very common and used in all kinds of machinery making them a very low cost option.
Mounting Bracket
In my original article I used a piece of aluminum to fabricate a mounting bracket for the servo. This early design did not have any means for frog wiring (this was handled through an extra circuit instead). This new design uses a design located on Thingiverse. Unfortunately, unless you own a 3D printer or are willing to pay a service, this bracket was not available. Luckily I had a 3D printer to make the bracket. I am making these brackets available as stand alone, kits or assembled for others who would like to try servos.
Servo Noise
One of the biggest complaints from users of servos is the noise that can happen. Noise is caused by one of two things, high speed and chatter. The servo is geared and at high speed it will make a ZIP sound. Slowing the servo will make them very quiet.
Chatter is what happens to a servo under sustained load. A servo is always powered and will try to hold its position. If there is a lot of push back, the servo will chatter as it tries to hold the position. I have had a few stubborn hand laid turnouts which caused the servo to chatter. These turnouts required “extra” effort to bend and get them into position. Once there the effort was too much and chatter occurred. After some tinkering I found that although significant effort was required to get the points into final position, the same effort was not required to hold them there. So instead I programmed the controller to move the servo to a point of great effort and then relax the servo to the minimum required to hold the point in place. In this way chatter was eliminated. I now program all my turnouts with this logic.
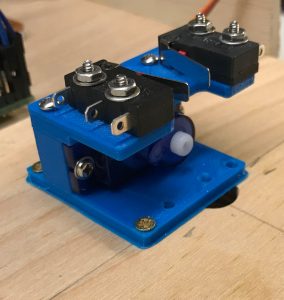
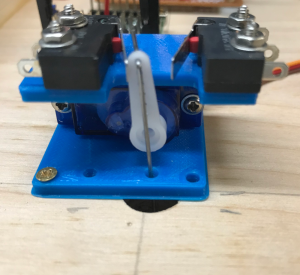
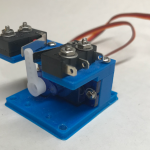
Servo Assembly

The servo and bracket assembly goes together very easily. The servo slips into the pocket and is held in place with the small sheet metal screws provided with the servo. I do recommend drilling and tapping the vertical holes for the 2-56 machine screws. This makes assembly of the top much easier. The micro switches are held in place with 2-56 screws, nuts and washers.
Once the motor is in the bracket it is VERY IMPORTANT to center the servo WITHOUT the arm on the servo. Failure to do so can cause damage to servo. Refer to the servo controller instructions on how to perform that action.
Once the servo has been centered, locate the appropriate pivot hole as close to center of the turnout arm as possible. Mark the holes from the bracket onto the mounting surface. Pre-drill the holes that were marked. Restore the bracket assembly again and screw in place. I use small brass #6 screws for this.
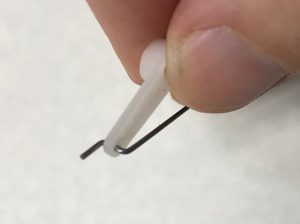
Once the servo is mounted in place, use 0.032 music/piano wire and create an “S” bend into one end. Insert the bent end into the servo arm as shown. Slide the other end of the wire into pivot hole and through to the turnout arm hole. Once the wire is threaded through the turnout arm, carefully attach the servo arm to the servo in the center position (remember, we centered the servo already).
At this point, you will be able to power up the servo and adjust the servo to find the best positions for the turnout (this portion is dependent on the controller you selected). Remember, too much force and you will get chatter. The end result should be just enough to hold the point in place.
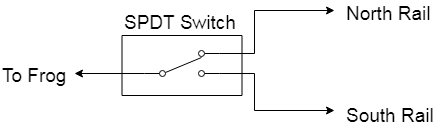
Wiring
Wiring the SPDT micro switches is very straight forward. Powering a frog only uses one of the switches, leaving the other open for signals or other purposes. The following is a basic wiring diagram for the frog. It will be necessary to test which rail is correct will need to be done prior to soldering the leads.
Conclusion
The more I have worked with servos the easier they become. I am able to assemble and mount these servo brackets almost as fast as a Tortoise. They take up significantly less space and provide the flexibility to do more custom things.
To assist others who would like to try servos with these brackets, I have setup a store on this website to sell the brackets at very little cost. All the products are available on the shop page.
I use servos controlled by an Arduino Nano or Uno. A DPDT switch controls the position with one pole and the frog power with the other pole. The software I wrote provides slow motion. I make my own plywood bracket. A bit complicated, but even cheaper
I have started to volunteer at our local railroad museum. They layout there is quite old, DC only, and the old switch motors are dying. I have a bunch of the exact servos you use. Could we maybe talk?
Personal email sent!